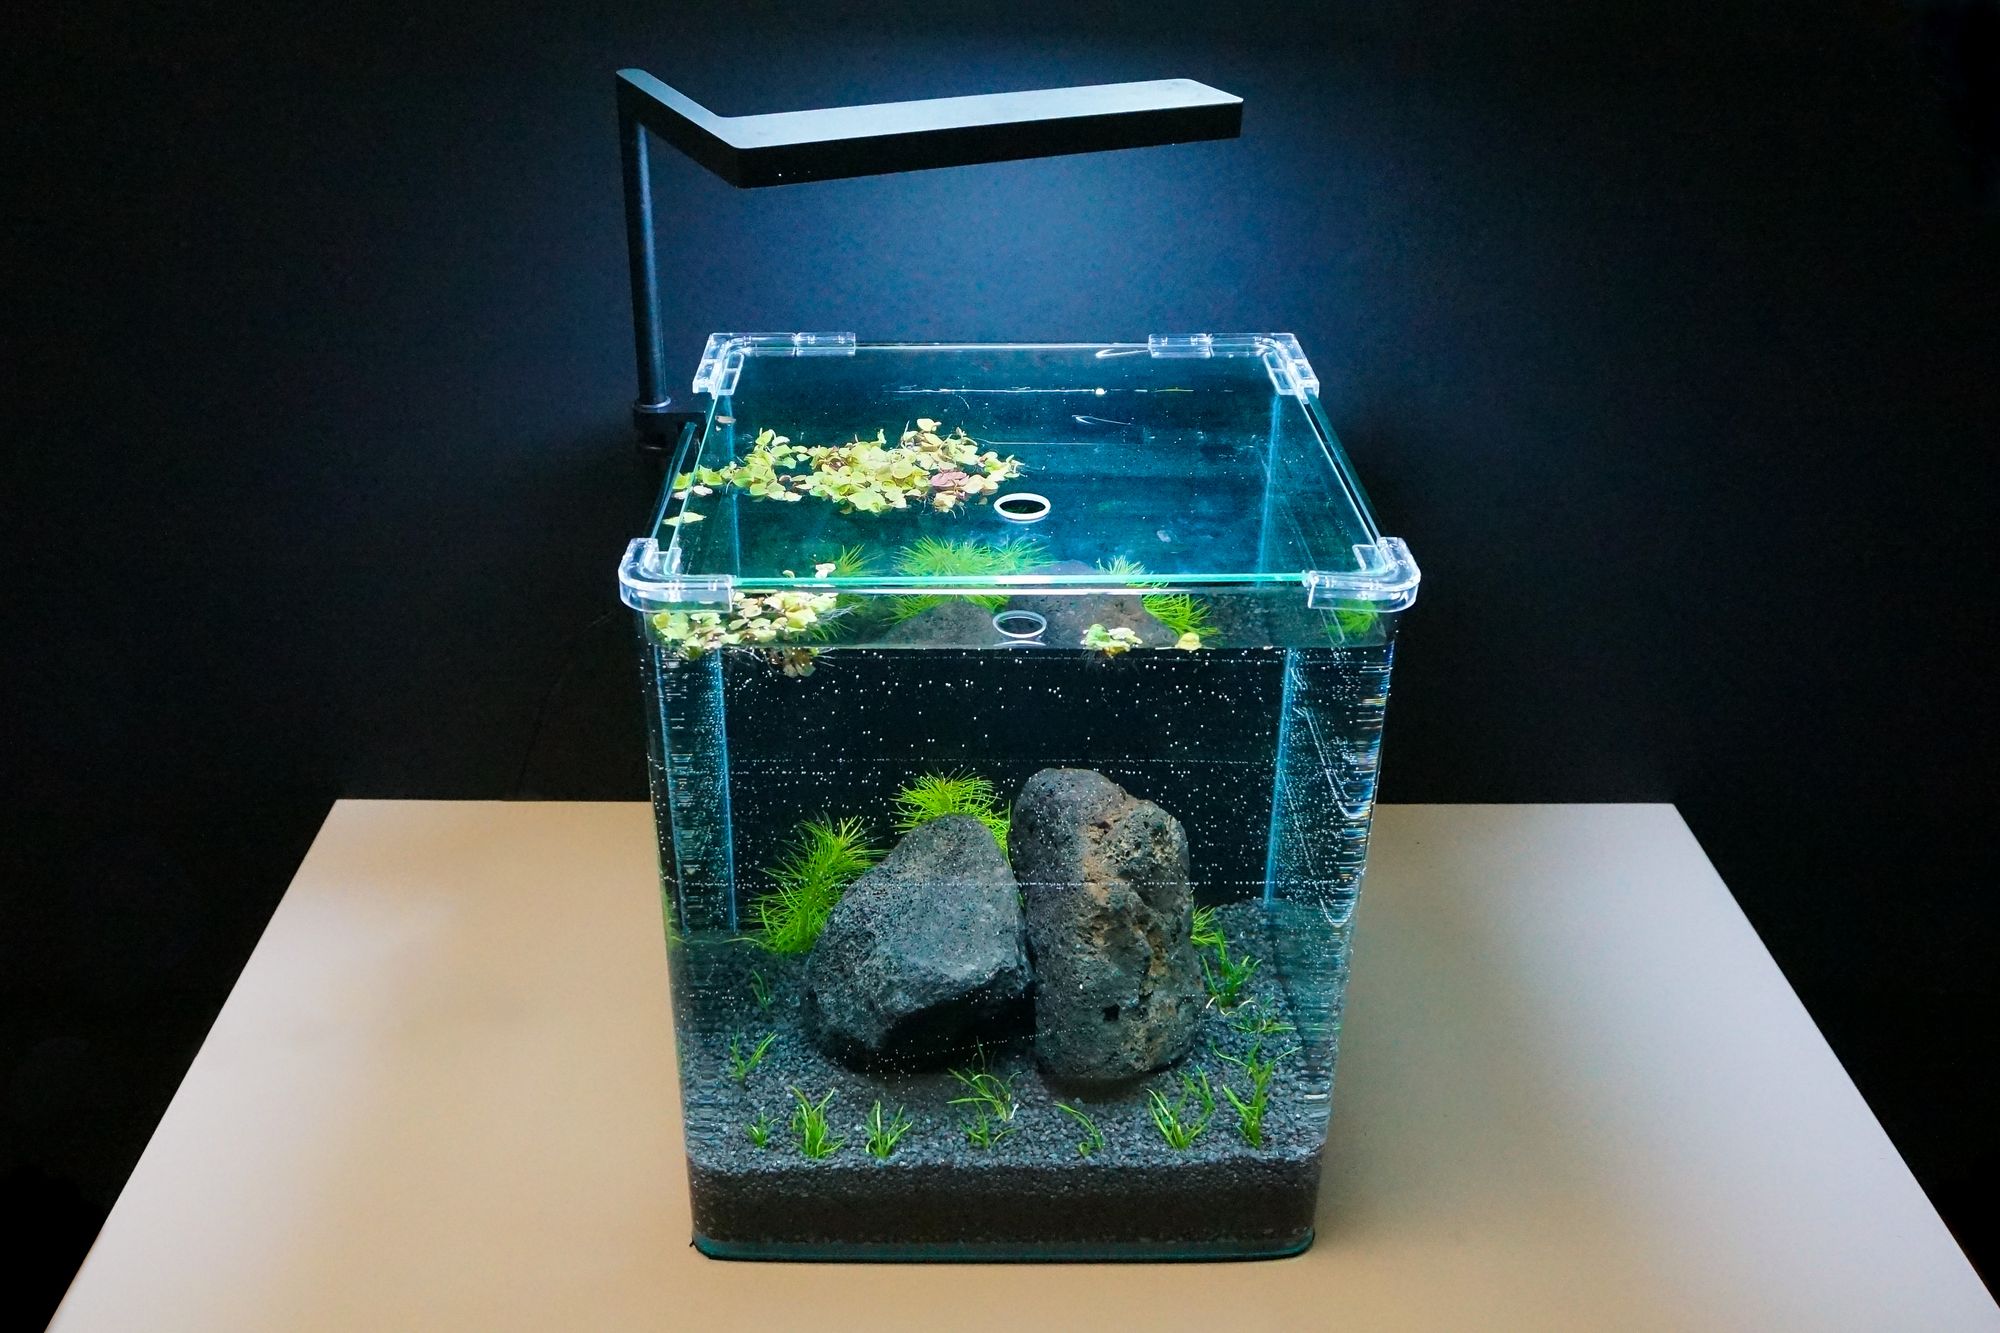
This No-Filter Nano Shrimp Tank build is an excellent starting point into the world of aquascaping and fish-keeping for beginners that don’t want to spend a lot of money on equipment or for people that want to familiarize themselves with the no filter / low tech aquarium method.
Most aquariums use technology and additives like filter (medium)s and fertilizers in order to create optimal water conditions for the plants and animals in the tank.
But there is also another way to achieve this in a more natural way and without additives or expensive equipment: by using the Walstad Method, named after Diana Walstad, a Californian biologist and aquarium enthusiast. A nano shrimp tank is the perfect playground to test this method for yourself and this article will explain how you can achieve a low-maintenance and low-tech aquarium in your home.
How it works
This setup is designed to become a healthy ecosystem without most of the usual equipment. The 3 reasons we don't need a filter are:
- The special substrate layer build hosts most of the good bacteria that would otherwise live in the filter.
- The large number of fast-growing plants we use here will deliver the necessary oxygen and filter out unwanted nutrients naturally.
- We are not overstocking the aquarium, so that we don't have any excess animal waste that needs to be filtered out.
The nutrients and fertilization for the plants are coming from
- the substrate layer itself and
- the waste of the livestock which has been converted into nutrients by the healthy bacteria in the substrate.
We do not intent to do any water changes (except when the ammonia or nitrite levels peak to keep the livestock safe). This is only possible, because we will not overfeed or overstock the aquarium. By controlling the waste and keeping a balanced ecosystem, water changes are not required.
Material list
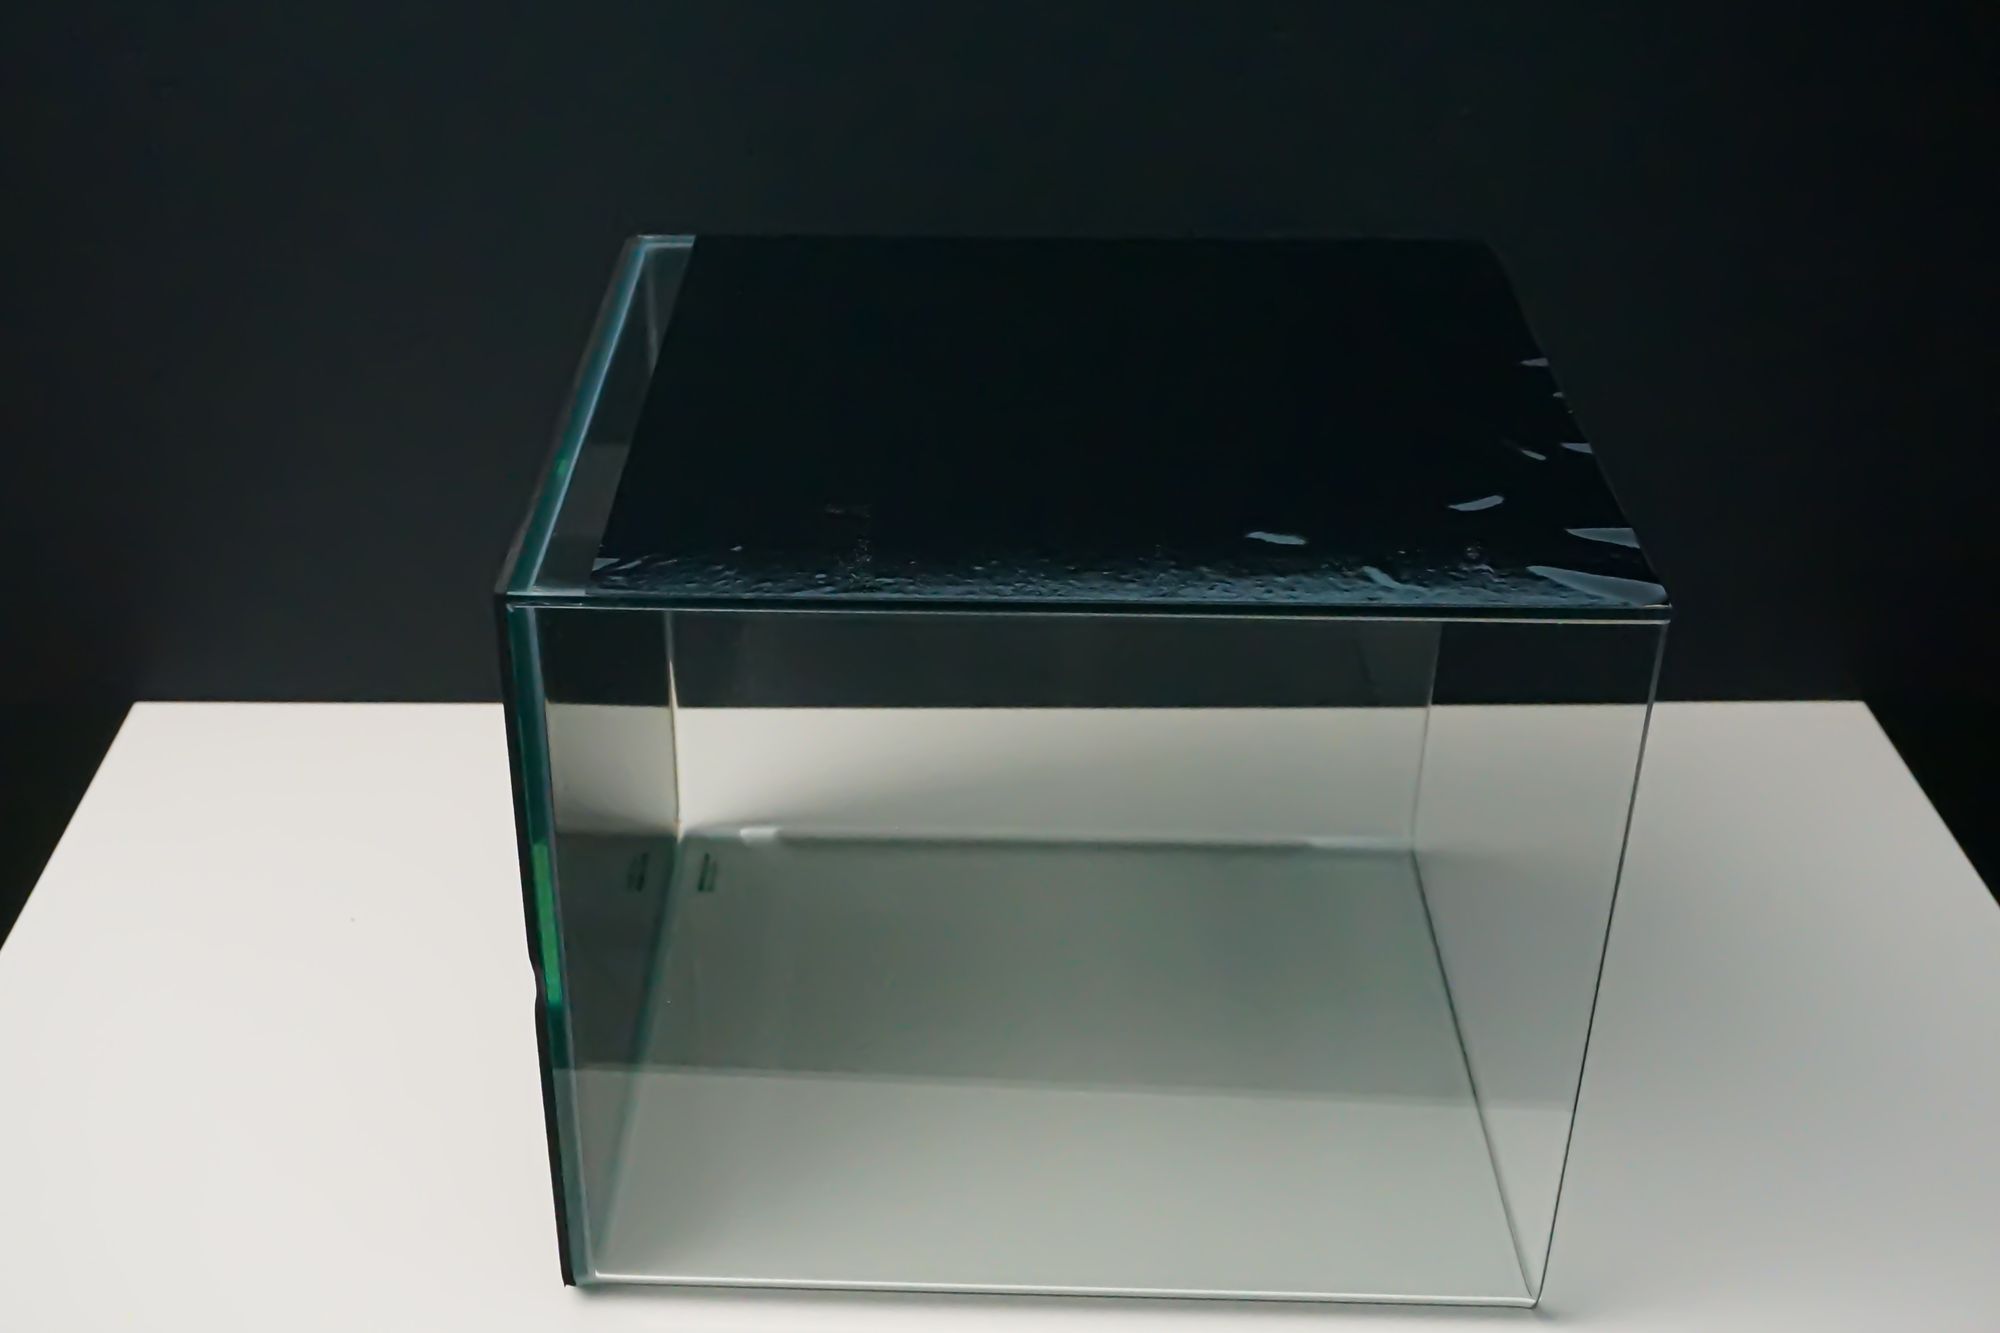
- Nano Cube
- Aquarium Background Foil
- Net Bags with Zipper
- Aquarium Soil
- Black Lava Rock
- Black Quartz Gravel
- Micro Sword - lilaeopsis brasiliensis
- Pogostemon Stellatus Octopus
- Phyllanthus Fluitans
- High End Aquarium LED Light or go for the affordable alternative
- Aquarium Tools
The materials used (including the more affordable LED light) add up to a total of about $250 (incl. tax and shipping). $70 for the plants and livestock and $180 for the equipment and substrate.
You can save money by buying second hand equipment or buying plants/livestock from a different seller. I don't recommend buying an aquarium starter kit in this case, because the included light / or any other equipment will mostly likely not be sufficient enough.
Things to Consider before Starting
- Tank size
- Aquarium light
- Aquarium Placement
- Aquarium Background
Aquarium / Tank size
The minimum officially recommended tank size for the Walstad Method is 5 gallons / 20 liters. Please be aware that this tank size is not suitable for any kind of fish and we definitely don’t recommend it. In a 5-gallons / 20-liter tank you can only keep a few snails and shrimp.
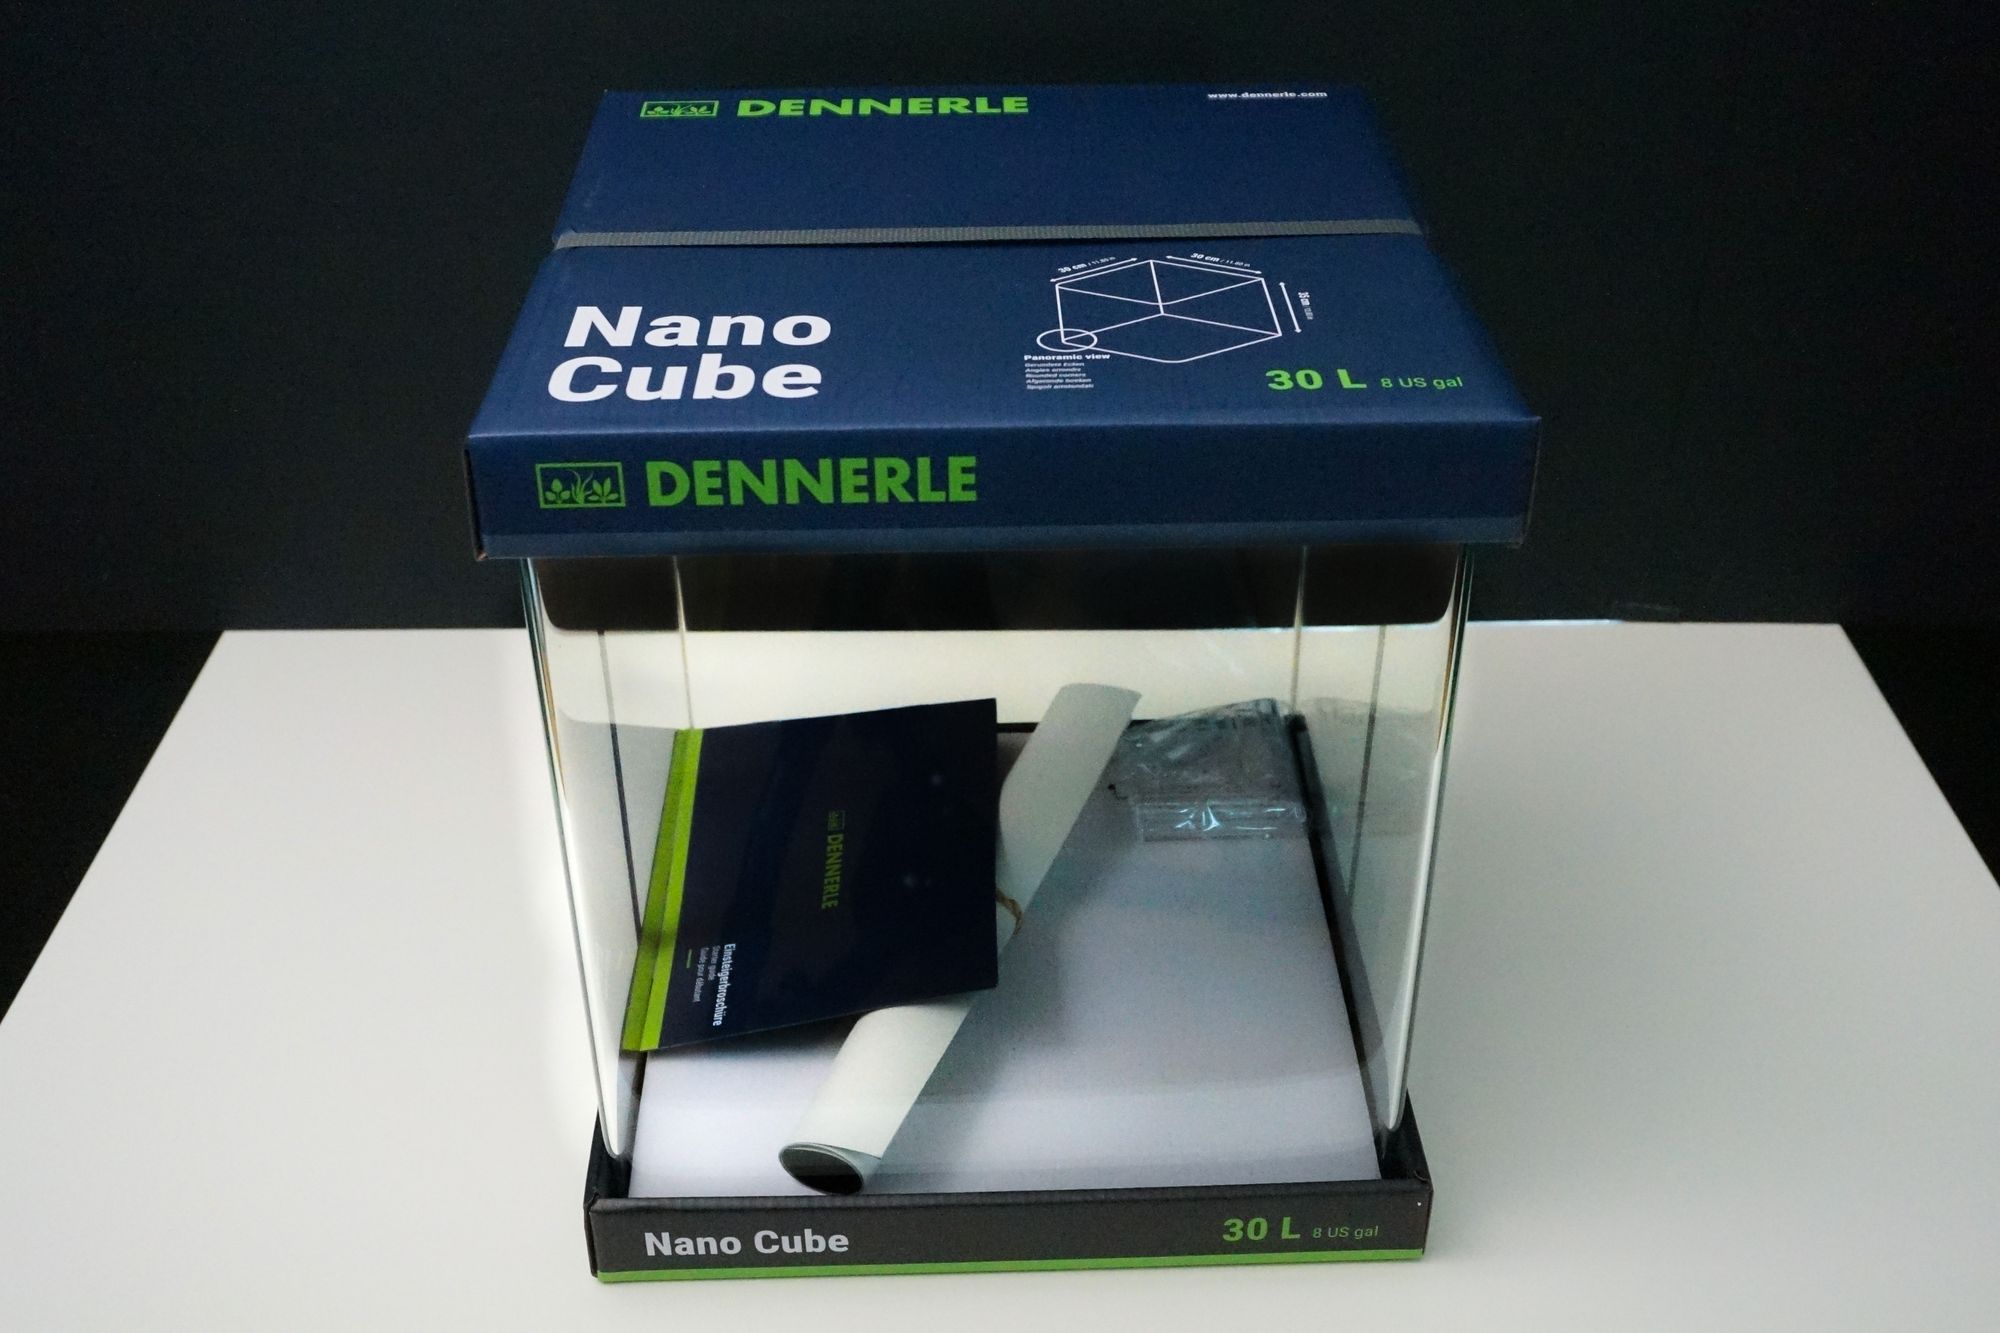 Nano Cube from Dennerle with 30 L / 8 Gal
To make it a bit easier to maintain stable water parameters we opted for a slightly bigger tank in this case with 8-gallons / 30-liter of overall volumewith a rubber matt underneath. After adding the substrate and hardscape the nano cube will contain roughly 6.5-gallons / 24 liters of water.
If you wan to learn more about the most important criteria when picking a suitable aquarium tank, check out our blog post about aquarium tanks.
Light
Another major point in creating a healthy ecosystem is good lighting, both in terms of temperature (measured in kelvin) and lumen (brightness). Choosing the right light ensures plant growth and oxygen production as well as simulating the natural day-and-night-cycle of your animals.
We recommend to choose a light with a temperature of roughly 6.500 K. The brightness needs to be calculated in regards to you tank size. In this guide we are using a 1300 Lumen LED, which leaves us with 162 Lumen per gallon (1300/8) or 43 Lumen per liter (1300/30). This is close to the maximum amount of light you should put into any aquarium and will be suitable for even the most demanding plants.
It is recommended to leave your light on for up to 6 hours in new aquariums and up to 8 hours in established ones that have already been cycled. This is to prevent algae, as the amount of light is one important factor for algae growth. With this setup we have decided to leave the light on for 16 hours every day in order to speed up plant growth significantly. Since we don't use fertilizer or CO² in this tank, light is one of the only factors we have to speed up growth.
If you wan to learn more about the aquarium lighting check out our blog post.
Aquarium Placement
The final placement of the aquarium is very important. We can only get away with 16 hours of lightin per day because we put this aquarium into a hallway without direct sunlight.
If you don't have a shaded place where to put your tank, the lighting needs to be adjusted to the natural day-and-night cycle of where you live to avoid algae (e.g., when the sun has risen at 8 am and sunset starts at 8 pm we would synchronize our lighting accordingly).
Aquarium Background
The aquarium used in this scape comes with a static cling foil that is already cut to the right size. If your chosen aquarium doesn't come with foil, we recommend buying some vinyl or static cling foil and apply it as described in our detailed article on aquarium backgrounds.
 Static cling shortly after being applied to the aquarium back panel.
 Pushing the card from the center towards the edges to remove bubbles and air pockets.
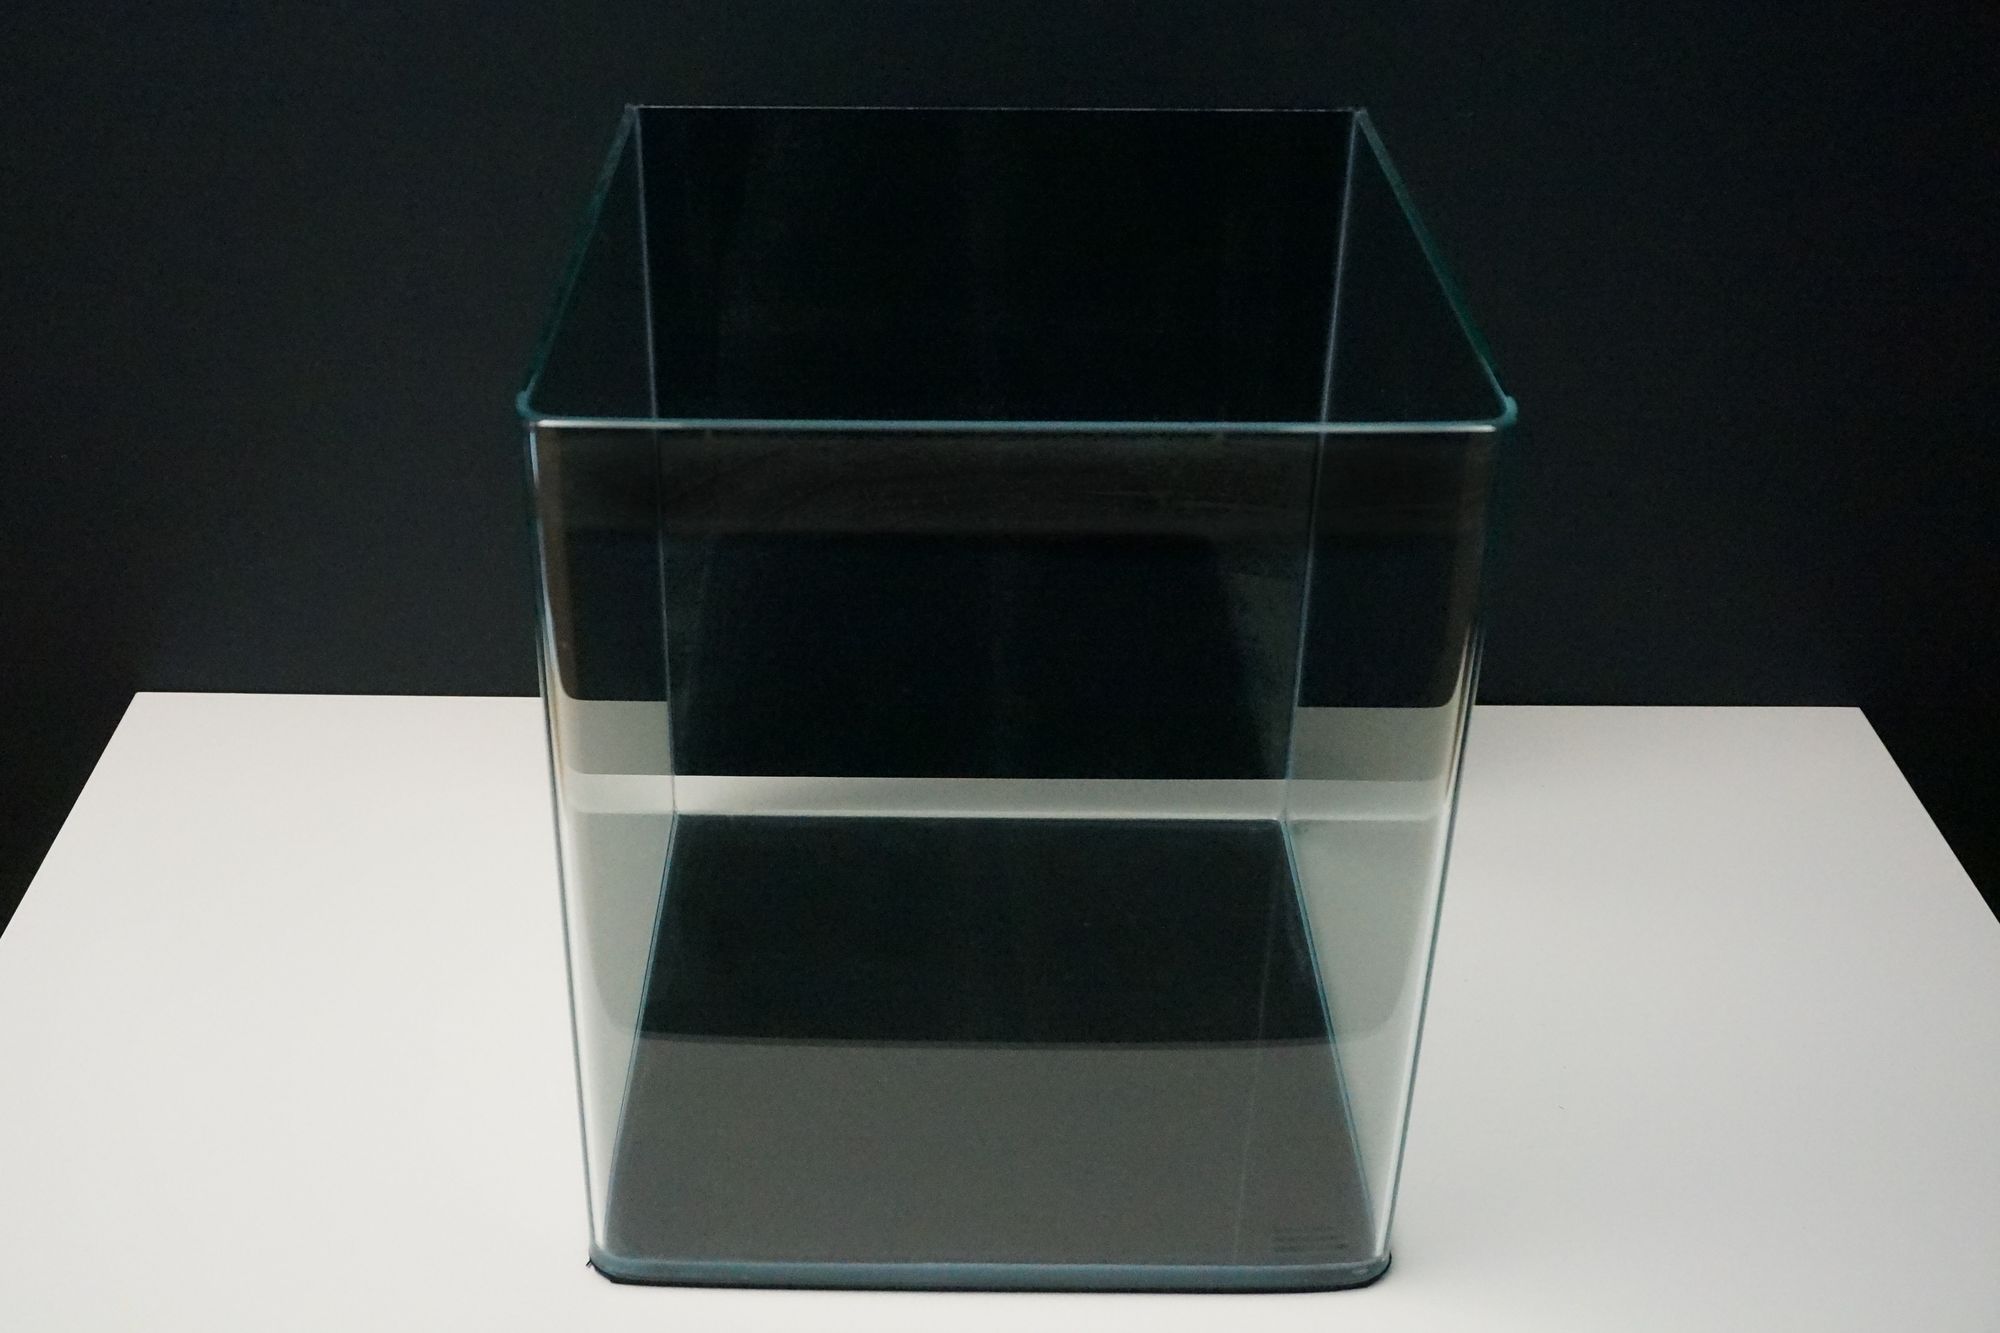 Aquarium background without air pockets.
Building the Aquarium
- Substrate Build
- Hardscape
- Planting
- Fill with Water
- Fish
- Maintenance
Prepare substrate / soil layer for planting
We start with the aquarium soil. You will need to build a layer of about 1 inch / 2 cm thickness that is placed on the aquarium floor with a distance from the front and side panels of about 1 inch / 2 cm. Use a credit card or spatula to push the aquarium soil together inwards.
This layer is very important, as our plants will extract the required nutrients from it for growth.
Pro-Tip: You can also fill up two filtration bags halfway and place them away from the front and side panels of the aquarium. The benefit of using aquarium soil in mesh bags reveals itself when breaking an old aquarium down. The different substrates are already seperated from each other, making them easier to reuse for coming scapes.
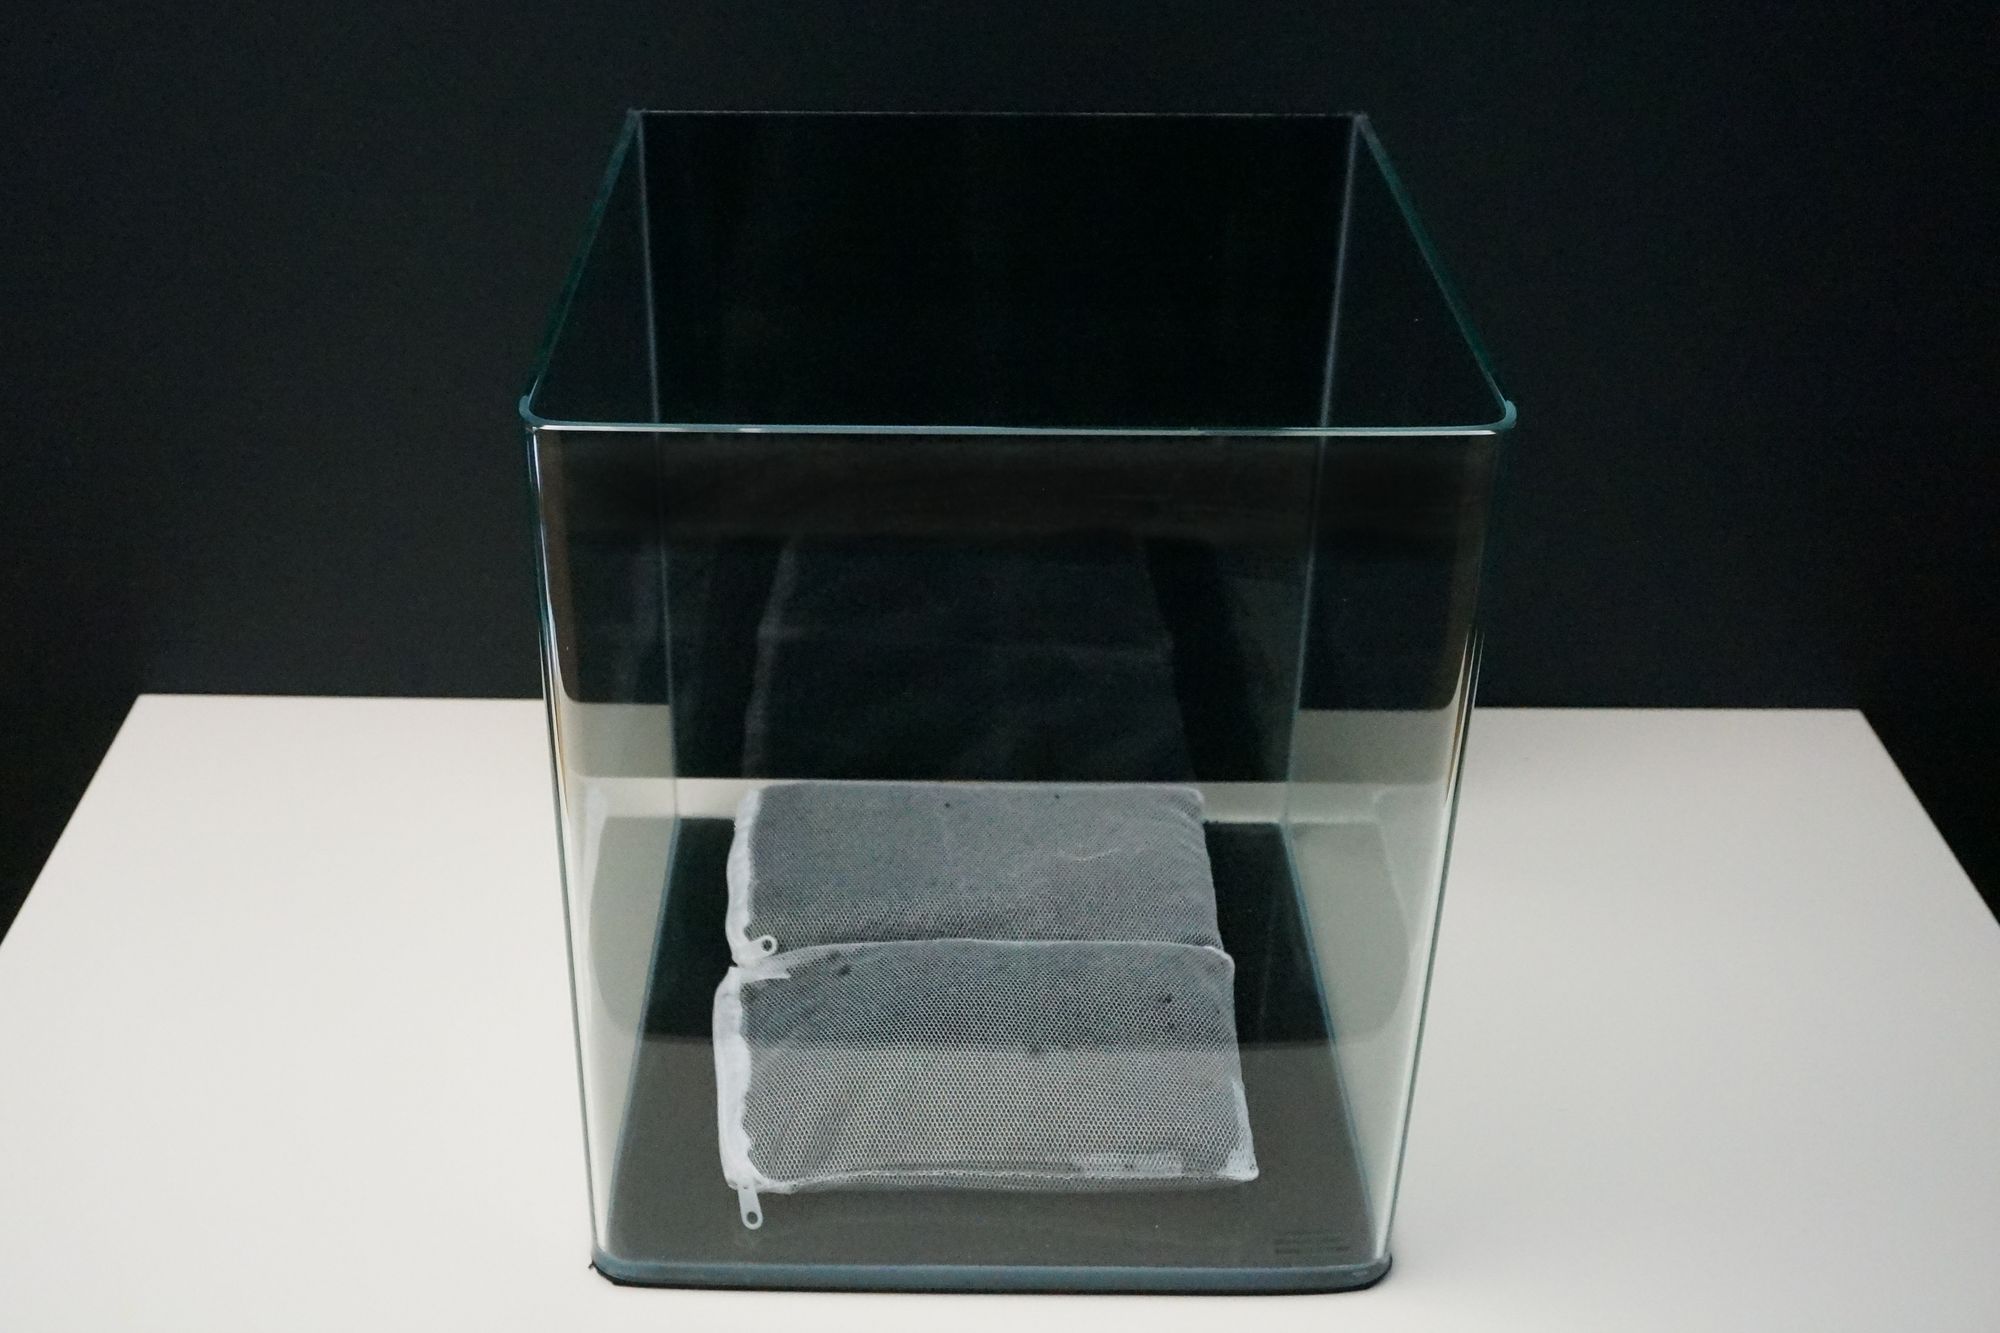 Two mesh bags with zipper filled with aquarium soil.
Now we use the gravel to fill up the 1 inch / 2 cm gap between the already placed aquarium soil and the aquarium panels. As soon as these are filled, we will pour a 1-2 inch / 2-3 cm thick layer on top of the aquarium soil layer. By doing so, we make sure the nutrient rich layer cannot leak nutrients directly into the water.
Make sure the gravel grain is at least 1/32 - 1/16 inch (1-2 mm) wide. To add a bit more depth you can pile up more gravel at the back of the aquarium. This layer is important because it will host the good and healthy bacteria helping to filter the water and the smaller grain allows the plants a better grip when being planted.
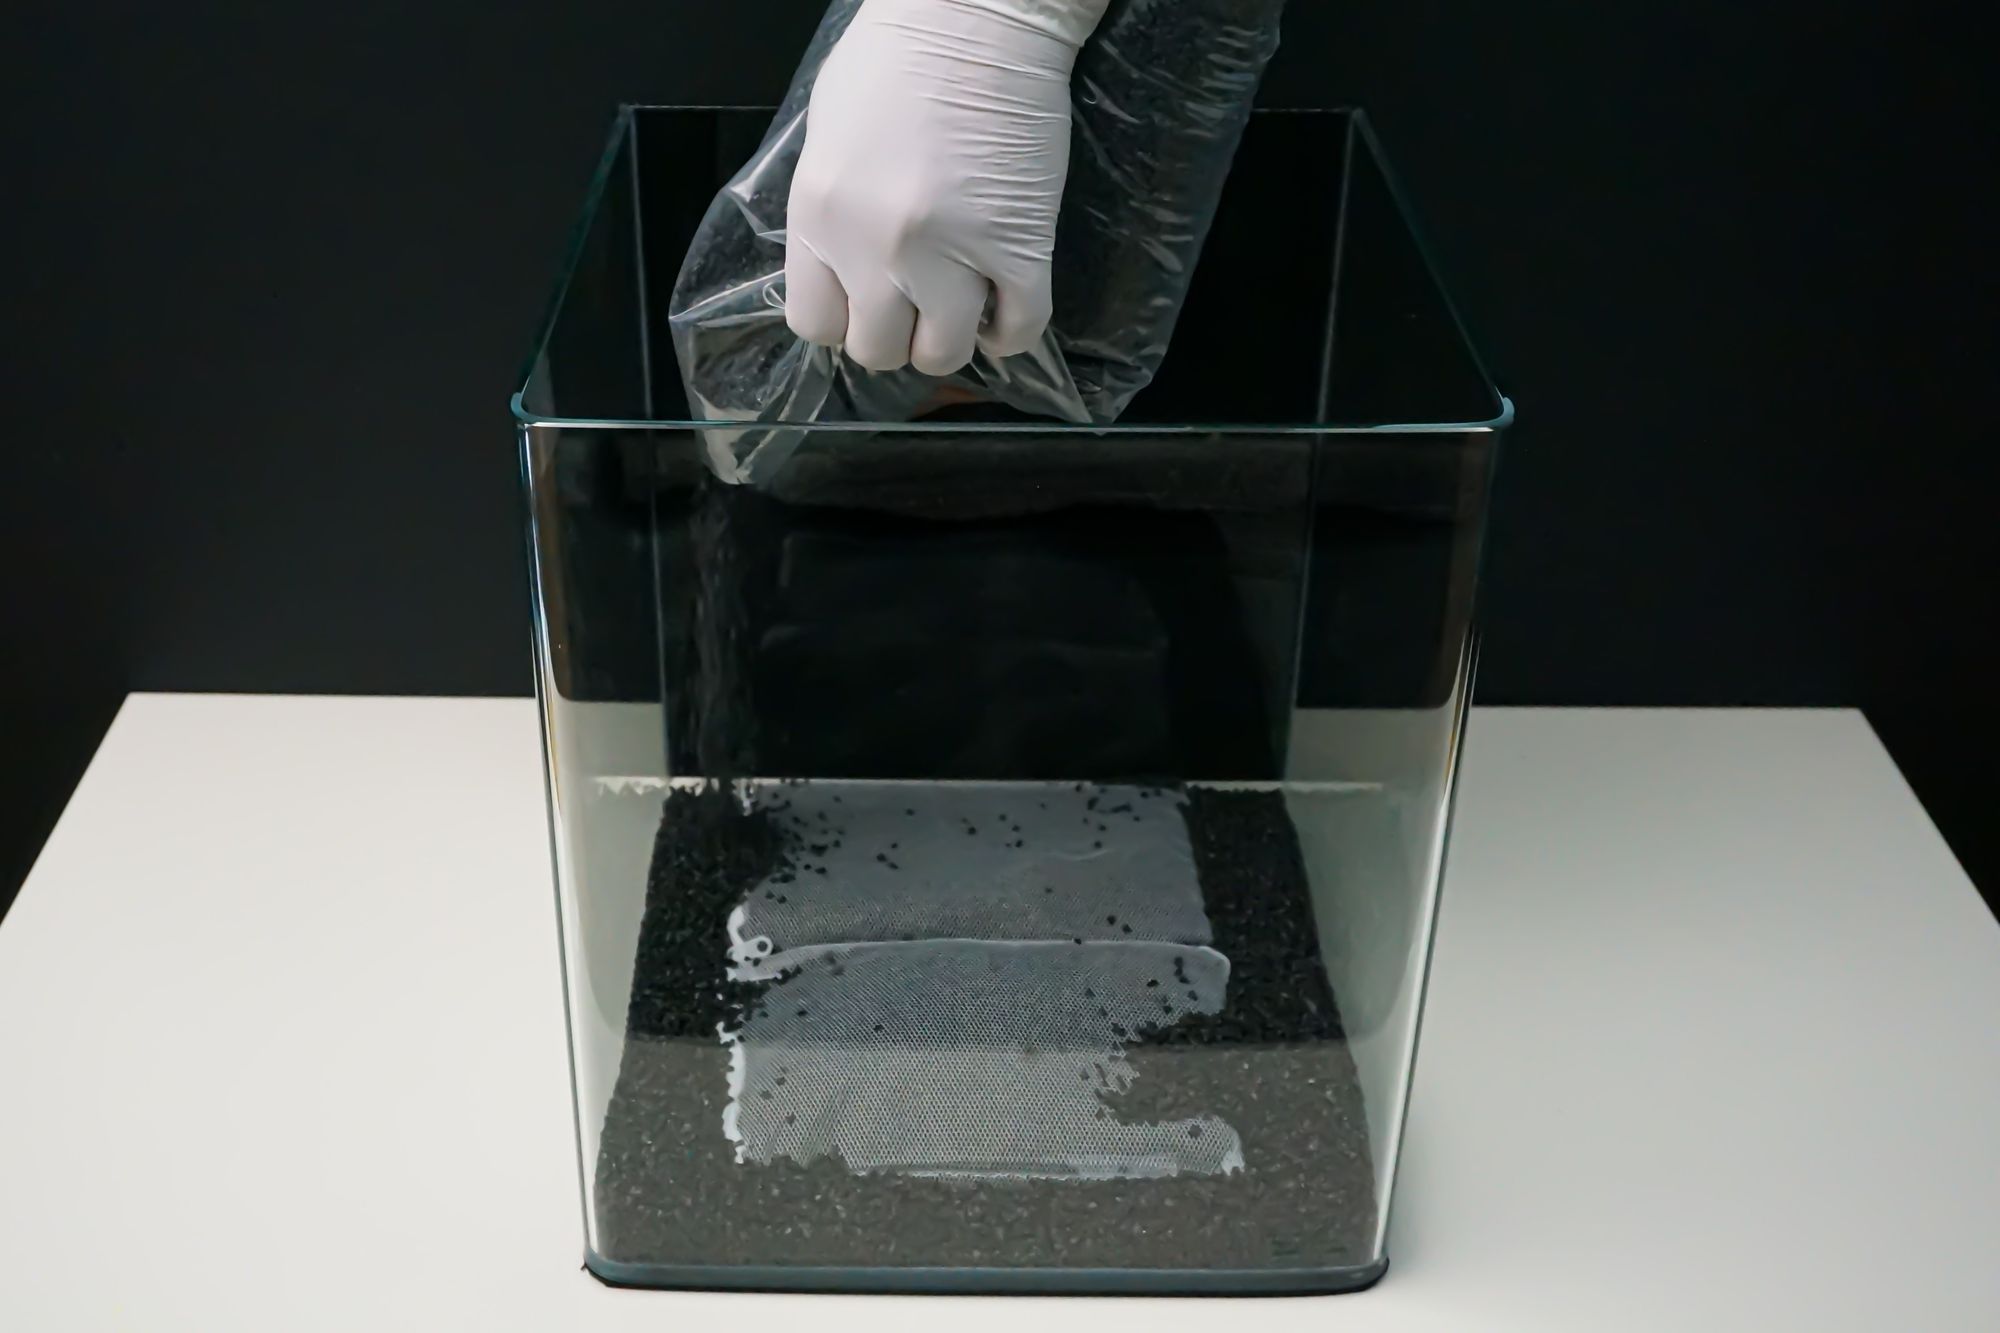 Adding gravel until the mesh bags are covered with at least 1-2 inch / 2-3 cm.
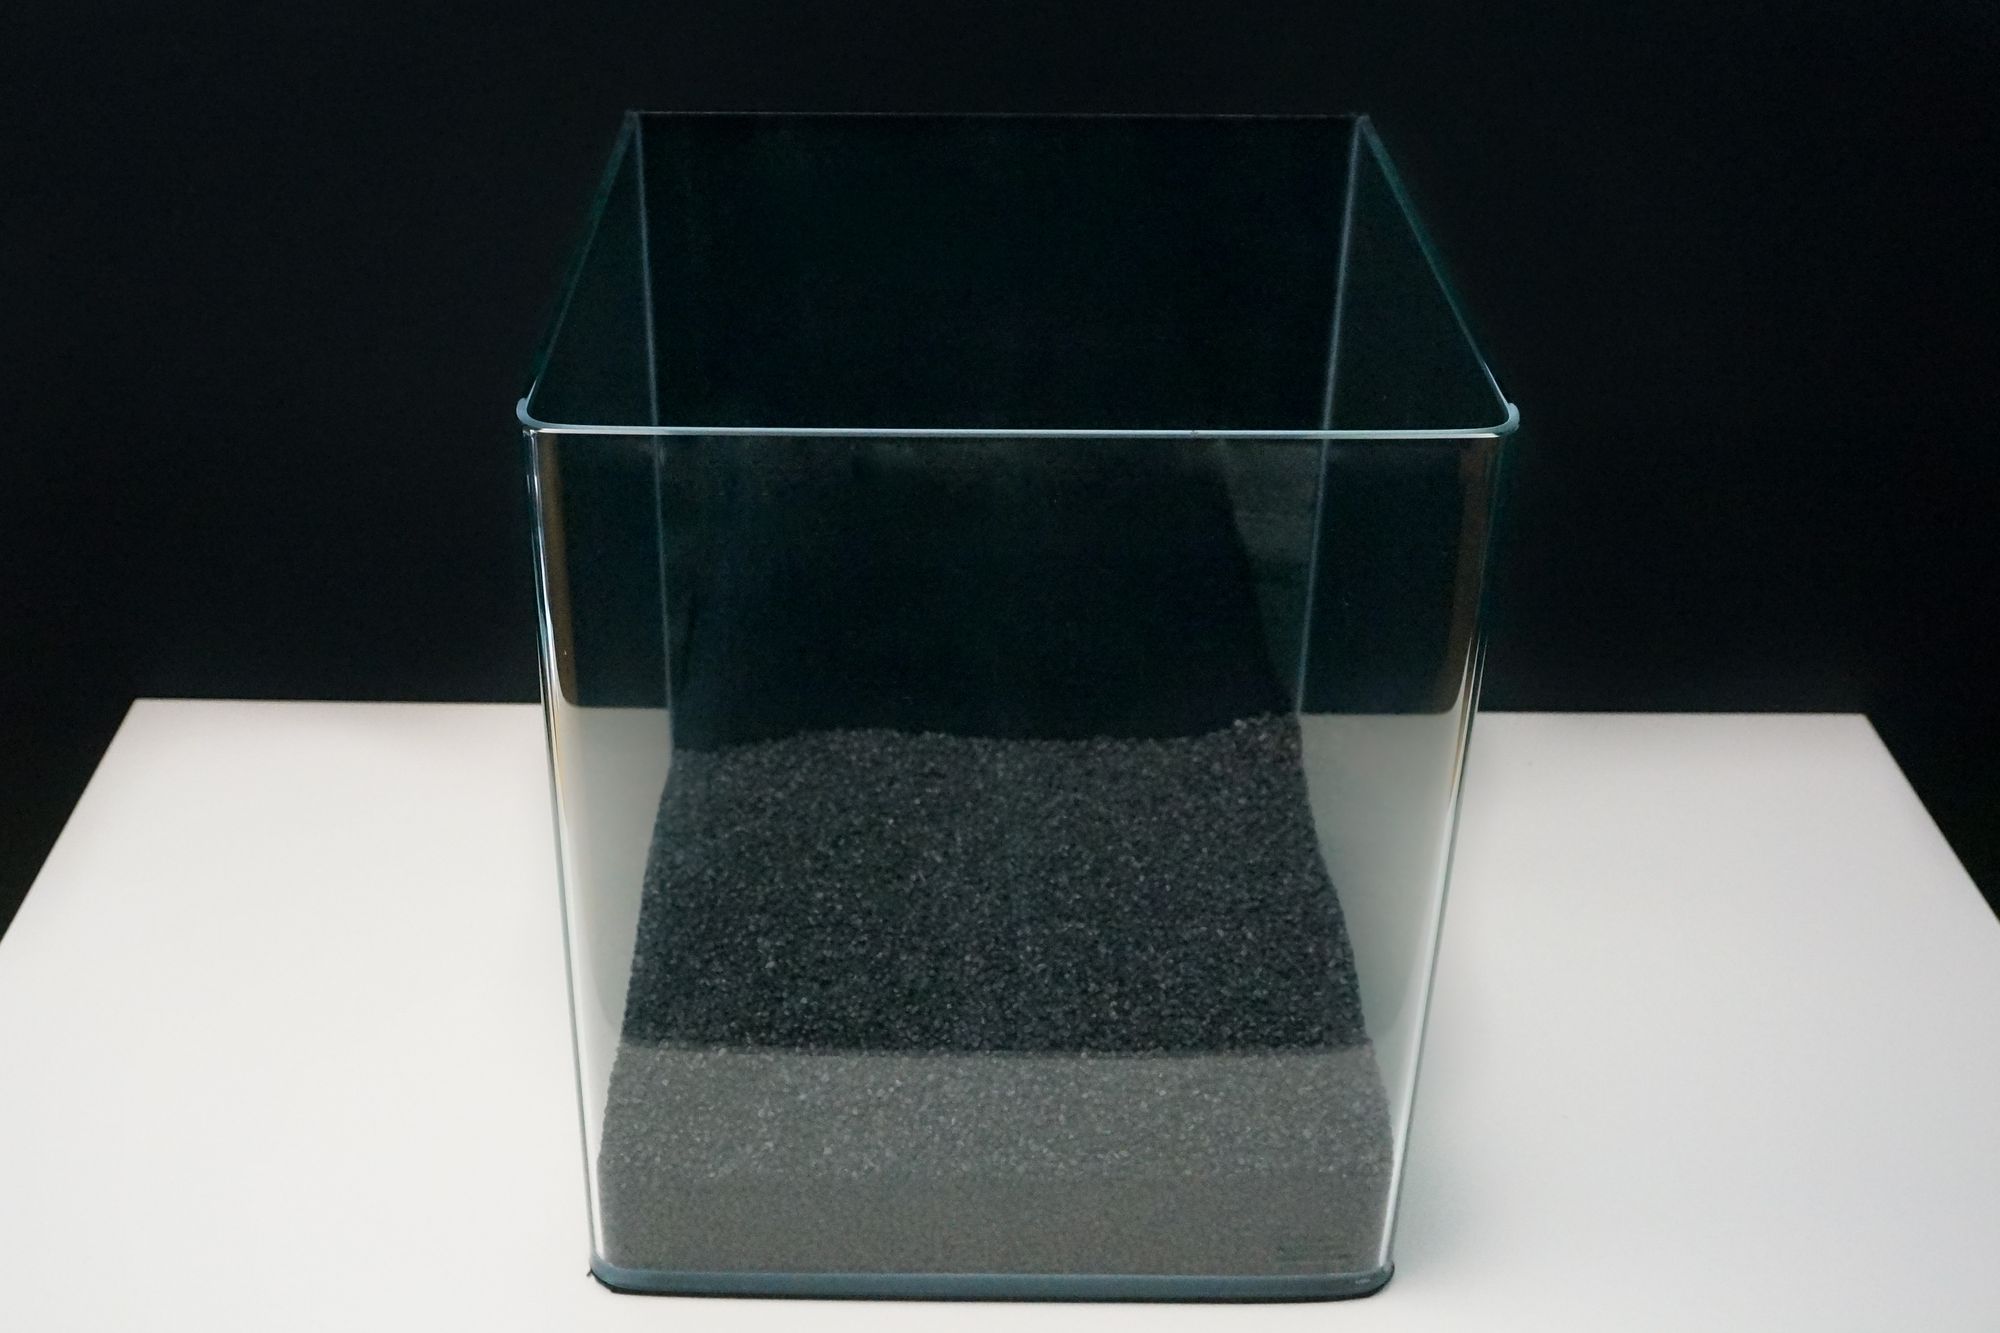 Final substrate layout.
If you want to learn more about the aquarium substrate check out our blog post.
Hardscape
In our blog post "Aquarium Substrate" you can find an overview of Cobbles and Boulders types and whether they tend to harden the water or not. As we intend to have a no filter and no water change aquarium we chose to use black lava rock for our hardscape as it doesn't harden the water or influence water parameters in any other way. With its porous holes it will also improve the water quality because it can host a lot of beneficial bacteria.
When it comes to hardscape there are many books and many opinions on how to do it. Do not feel pressured following these instructions, the most important thing is, that you like what you did. Especially as a beginner it takes several scapes / attempts to find a good looking layout. Only practice will get you there.
For this scape we wanted to keep it very simple and tried a number of different positions for the rocks. In the end we decided to only place two black lava rock cobbles in the nano cube in order to not overload it.
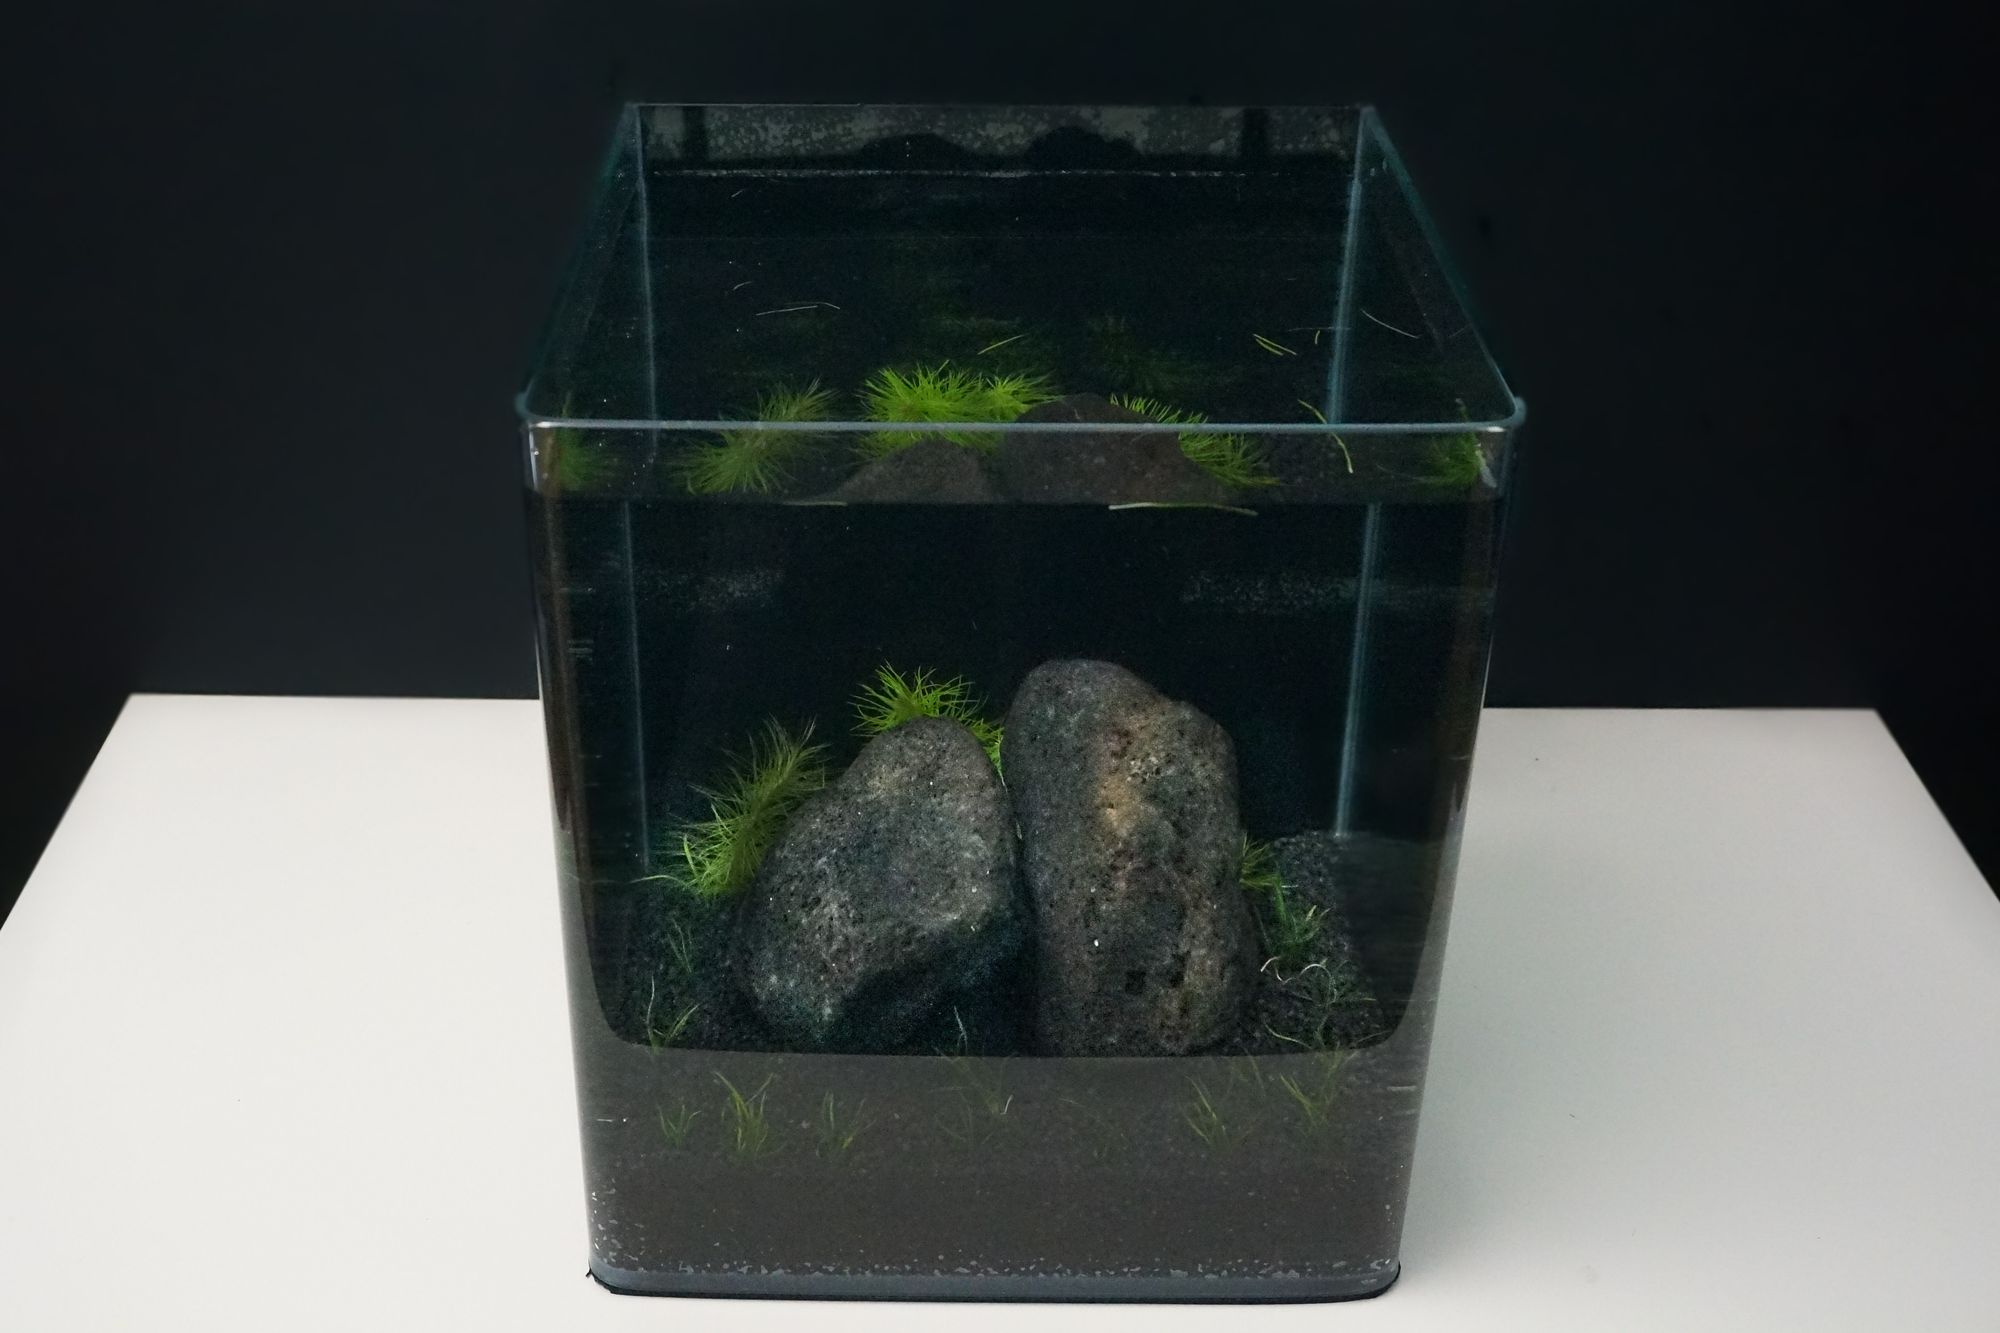
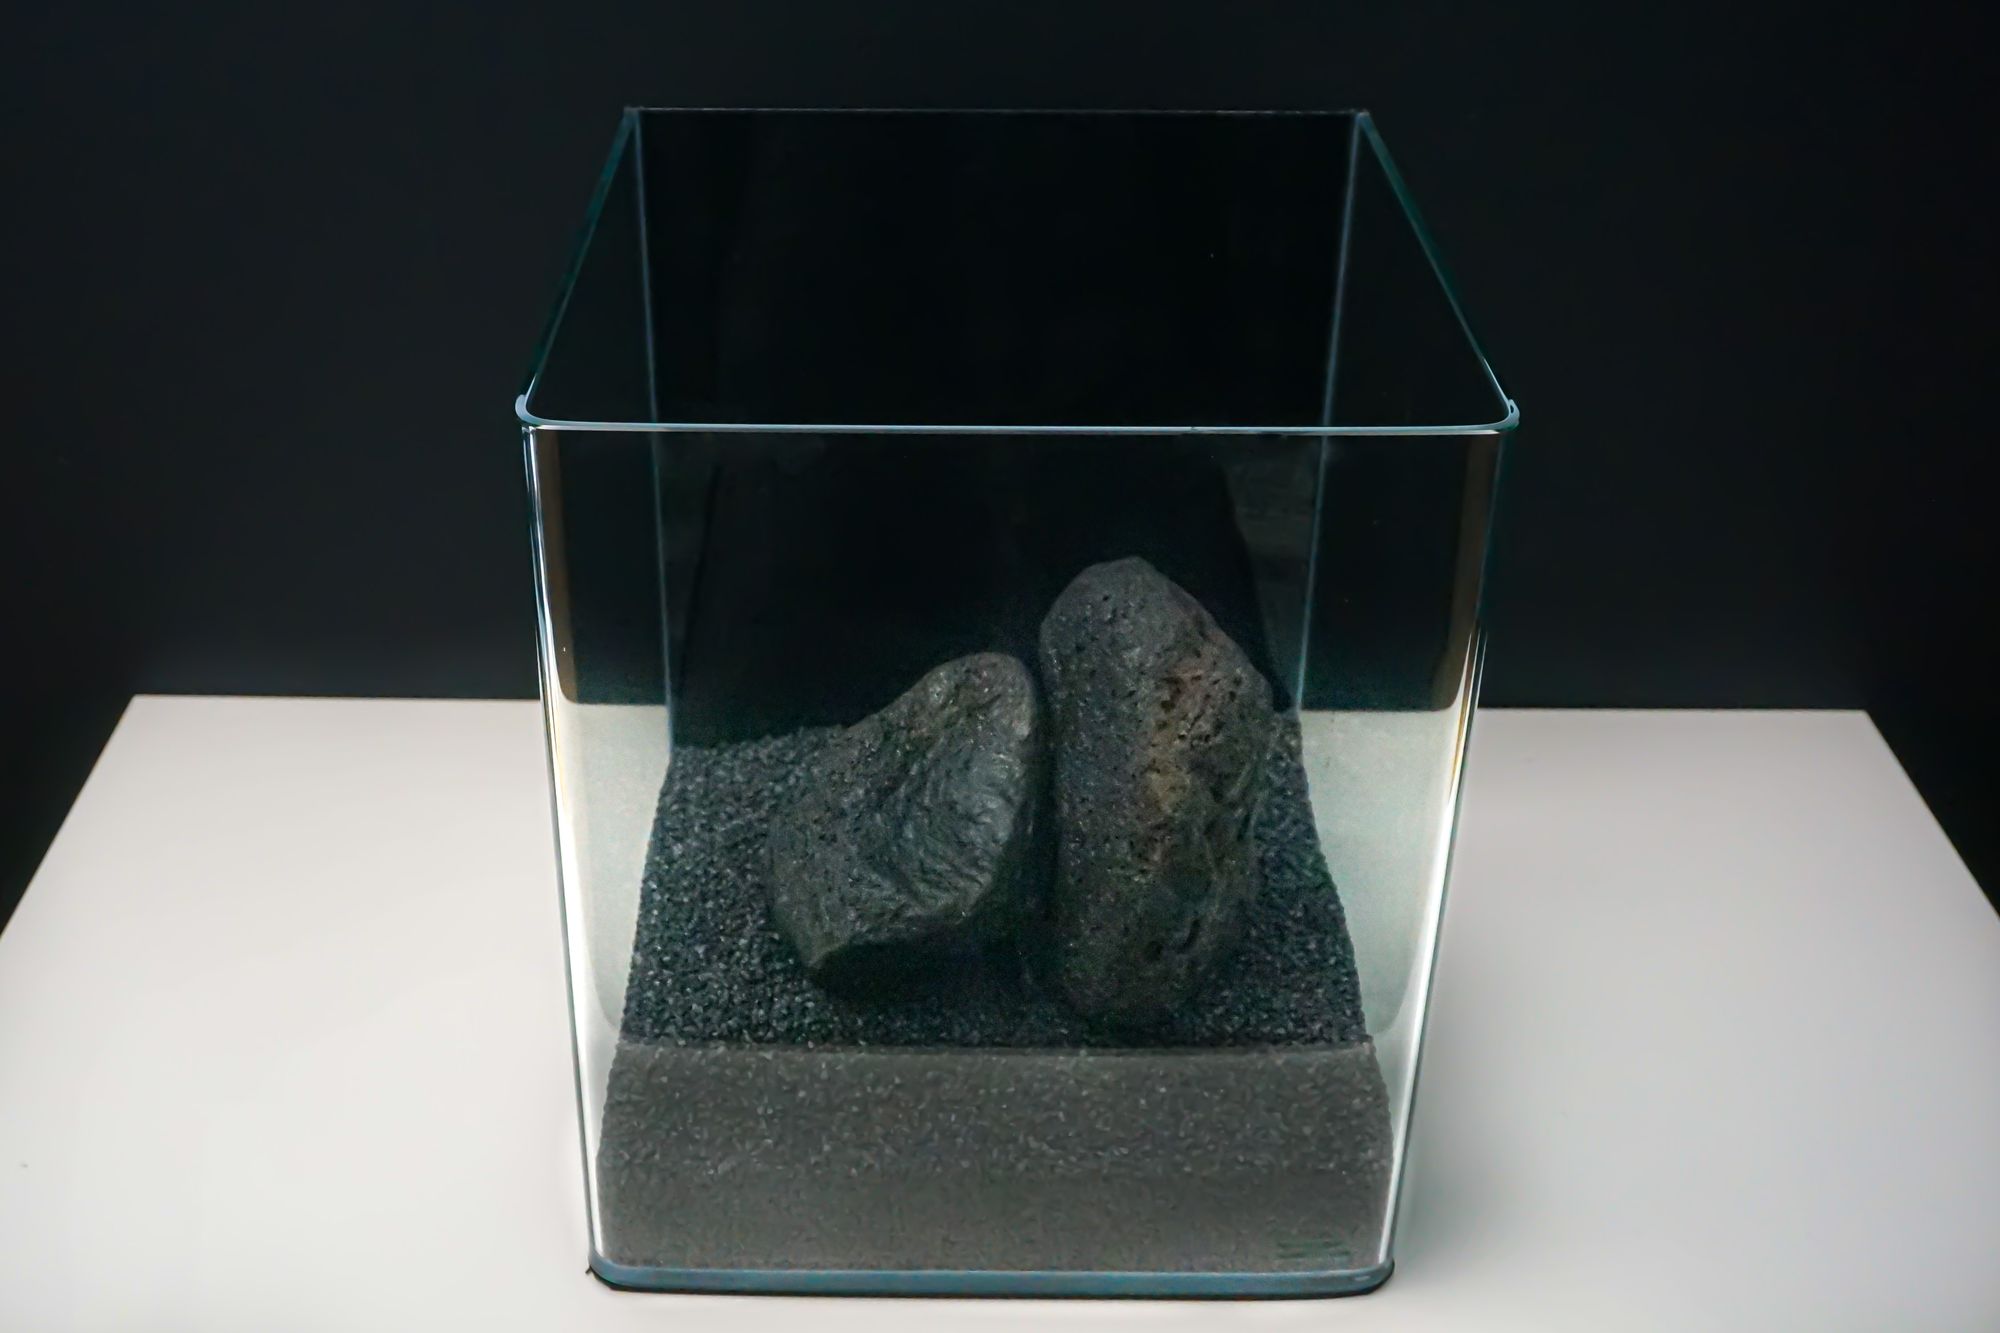 Final hardscape, 2 black lava rock cobbles leaning against each other.
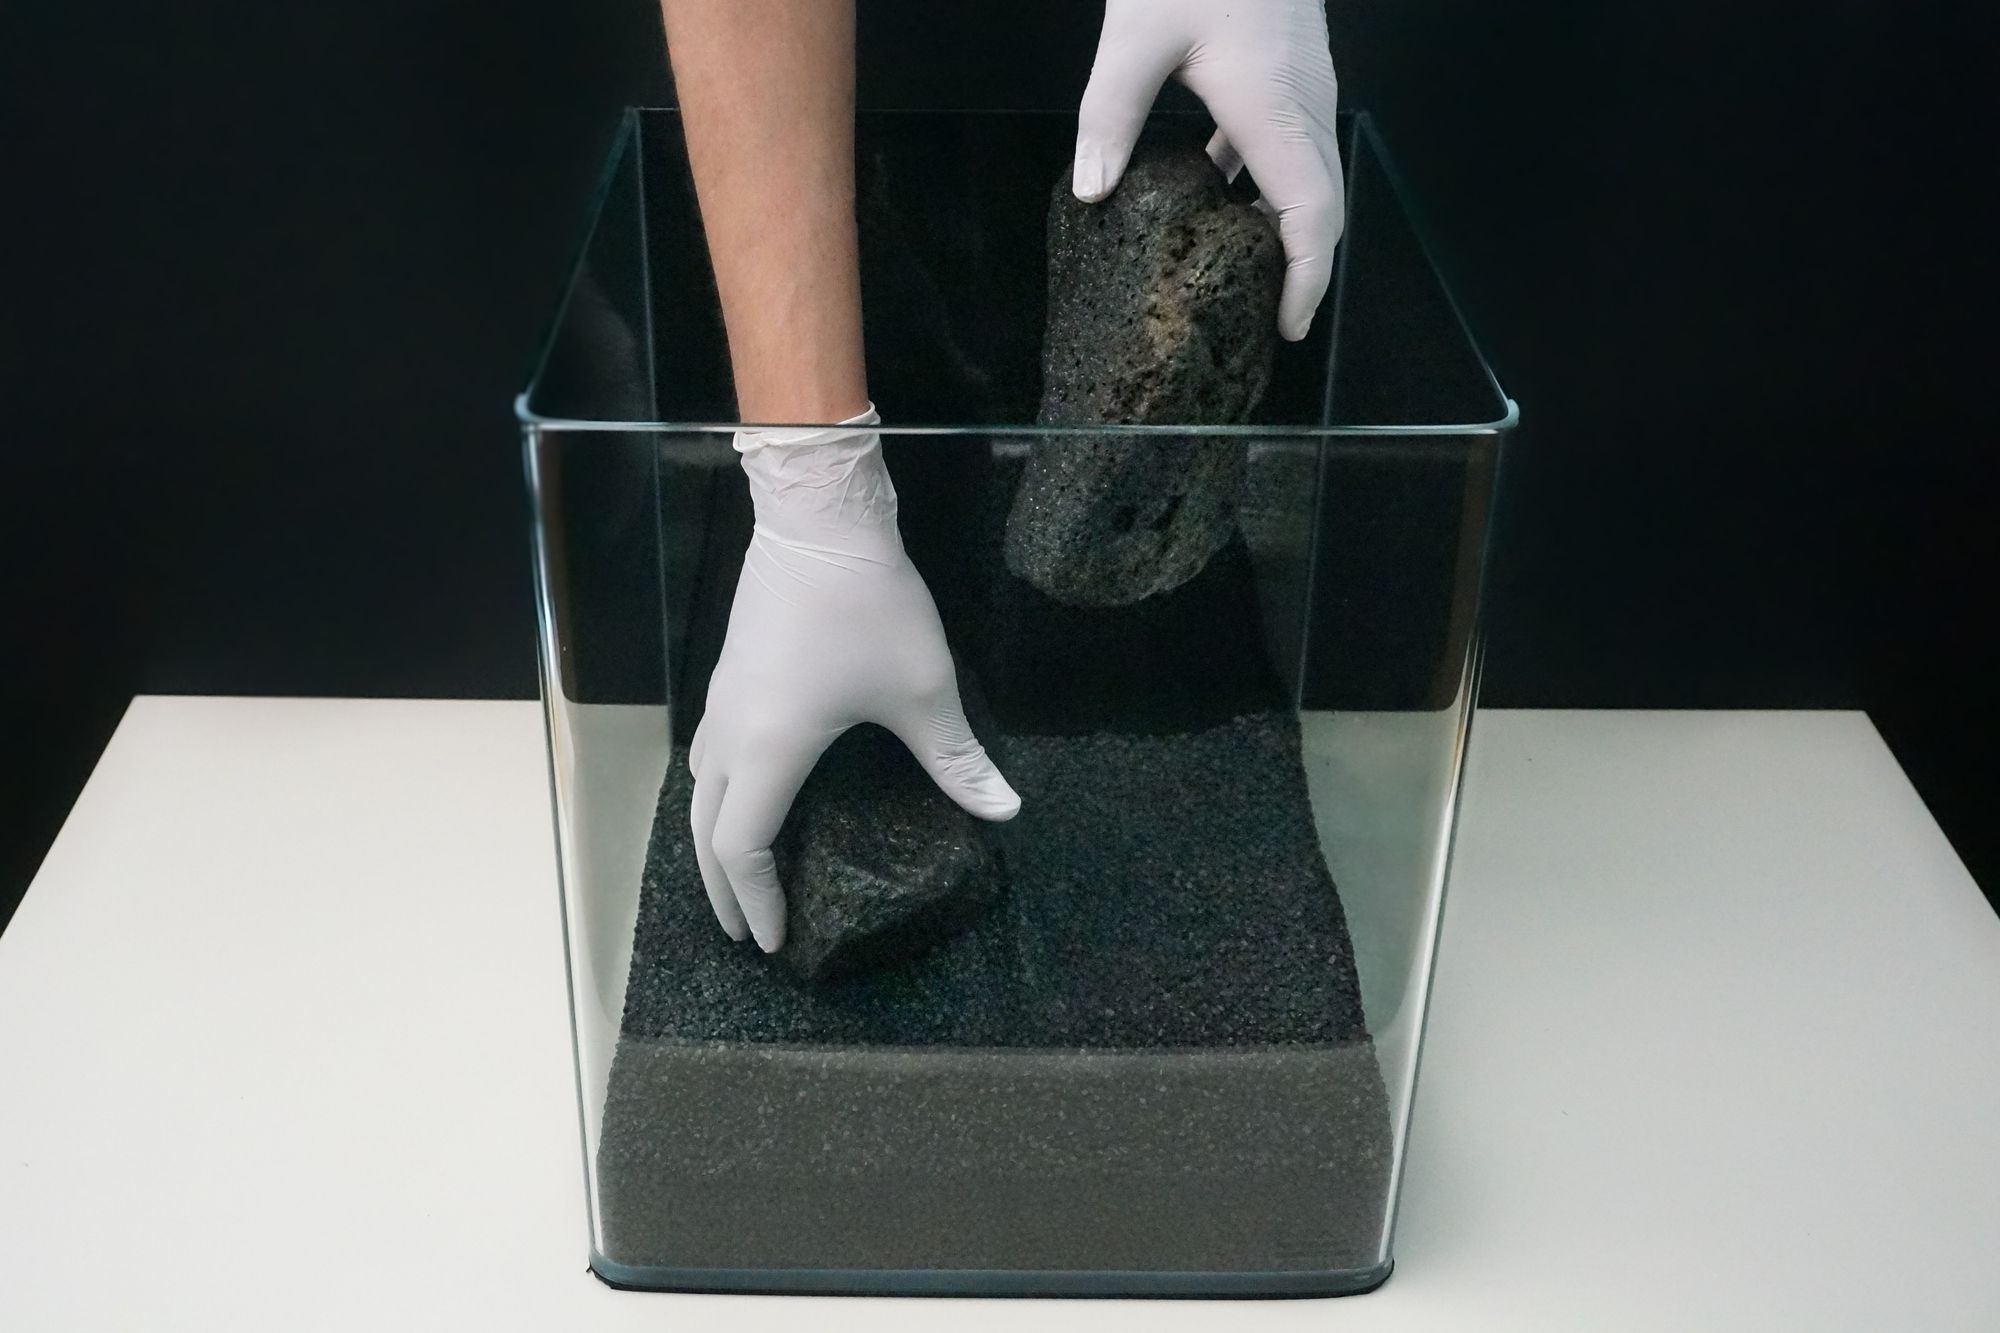 Placing the 2 black lava rock cobbles for the hardscape.
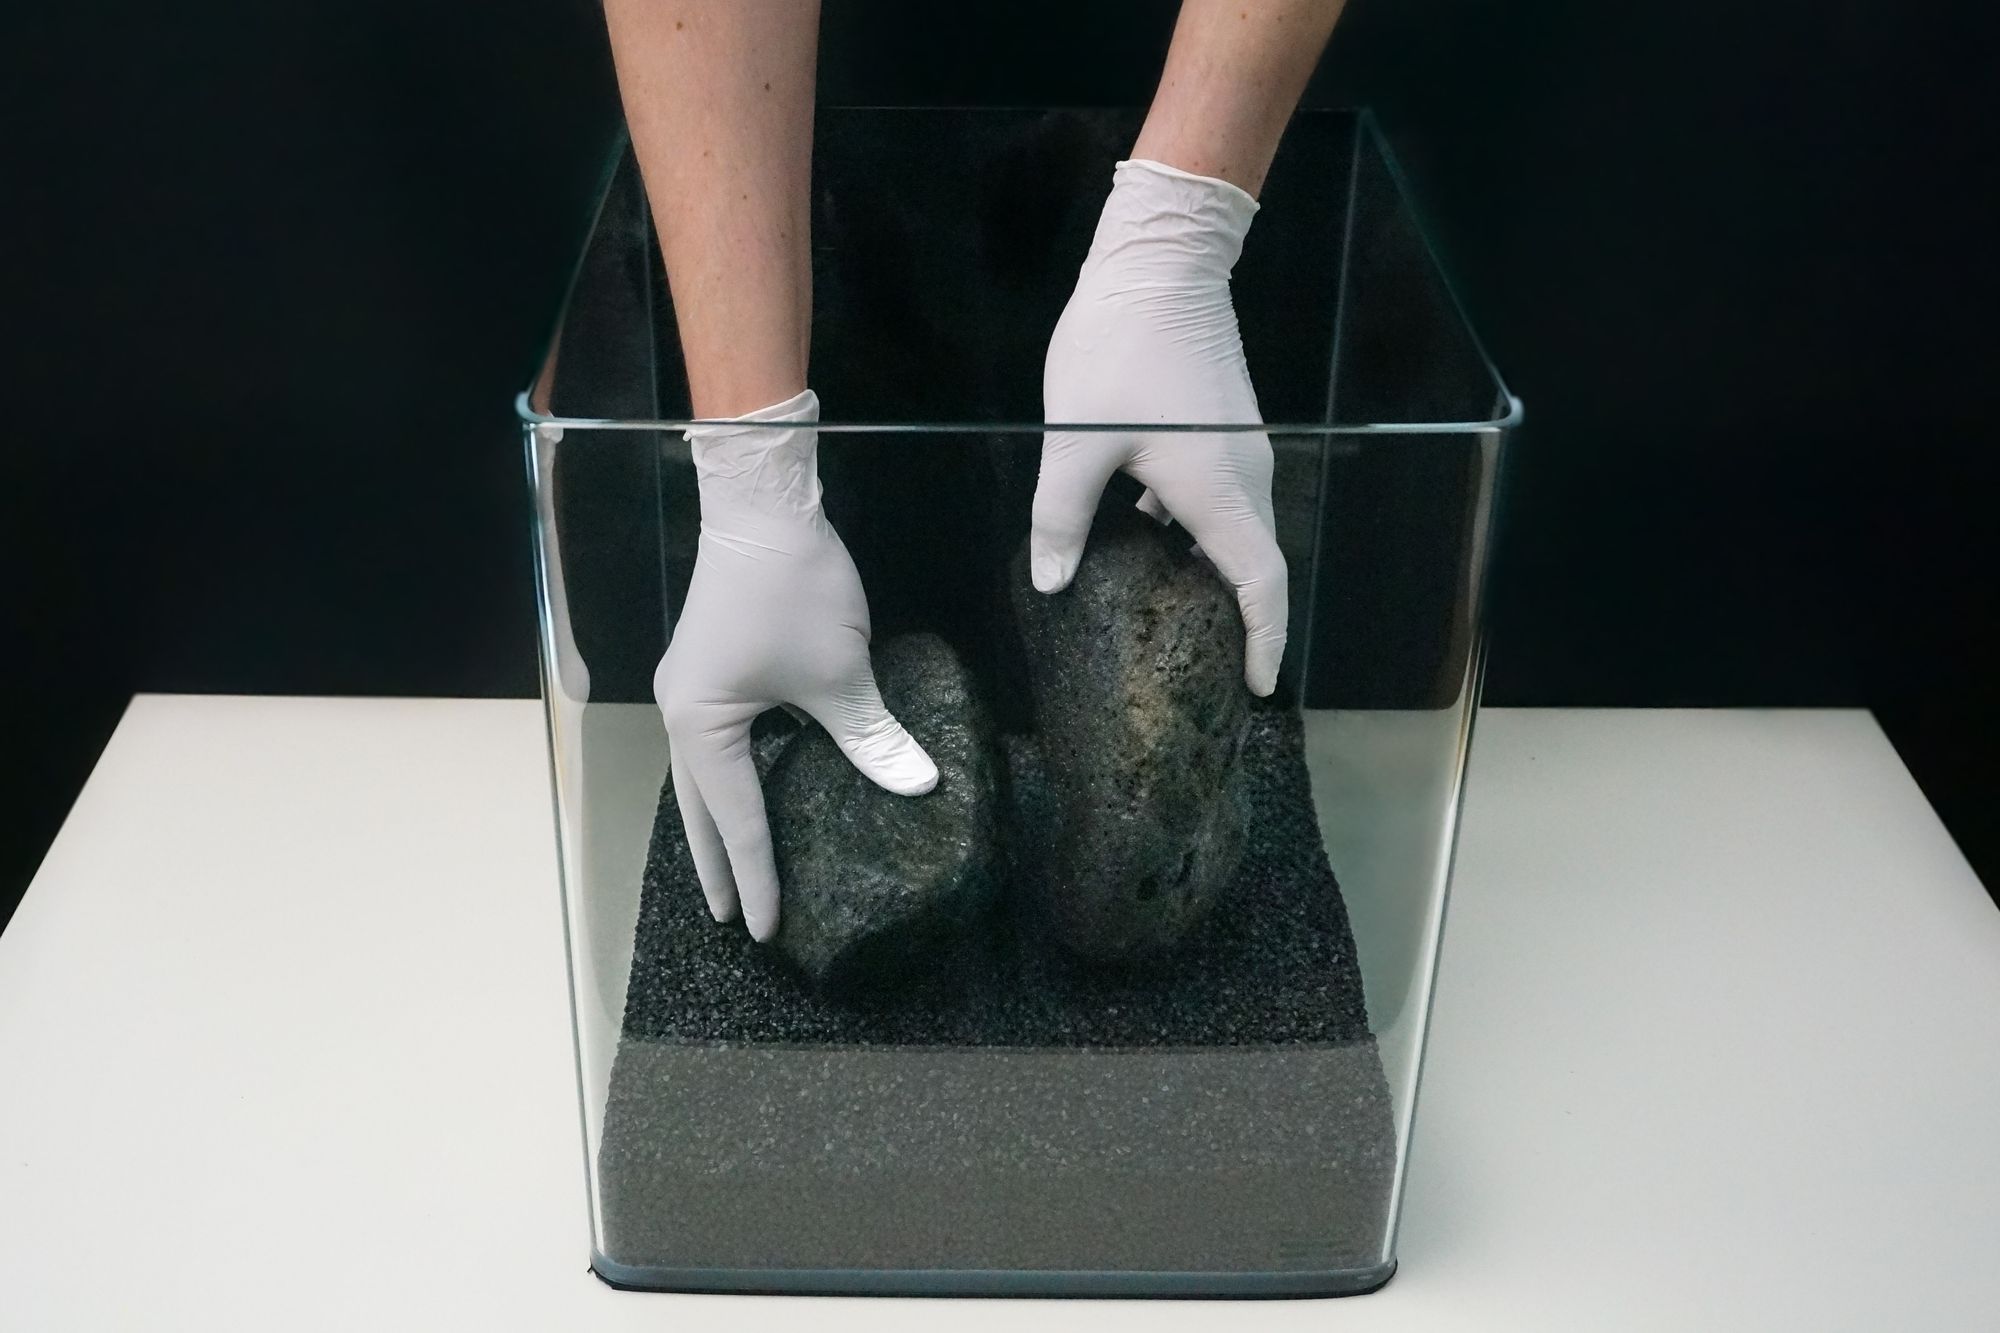 Placing the 2 black lava rock cobbles for the hardscape.
Planting
Since we don’t use any equipment in this tank it is also extremely important to choose plants that are very easy or easy to care for. Due to the lack of water changes we also need plants that grow fast or very fast, so that the nutrients in the water can be quickly filtered out naturally by the plants.
It is crucial to pick suitable plants for the foreground, middle ground, background and the surface of the aquascape. If you’d like to use different plants from the ones in this guide, you can always refer to the info box of our plant guides where we give a quick overview of plant requirements and ideal placement.
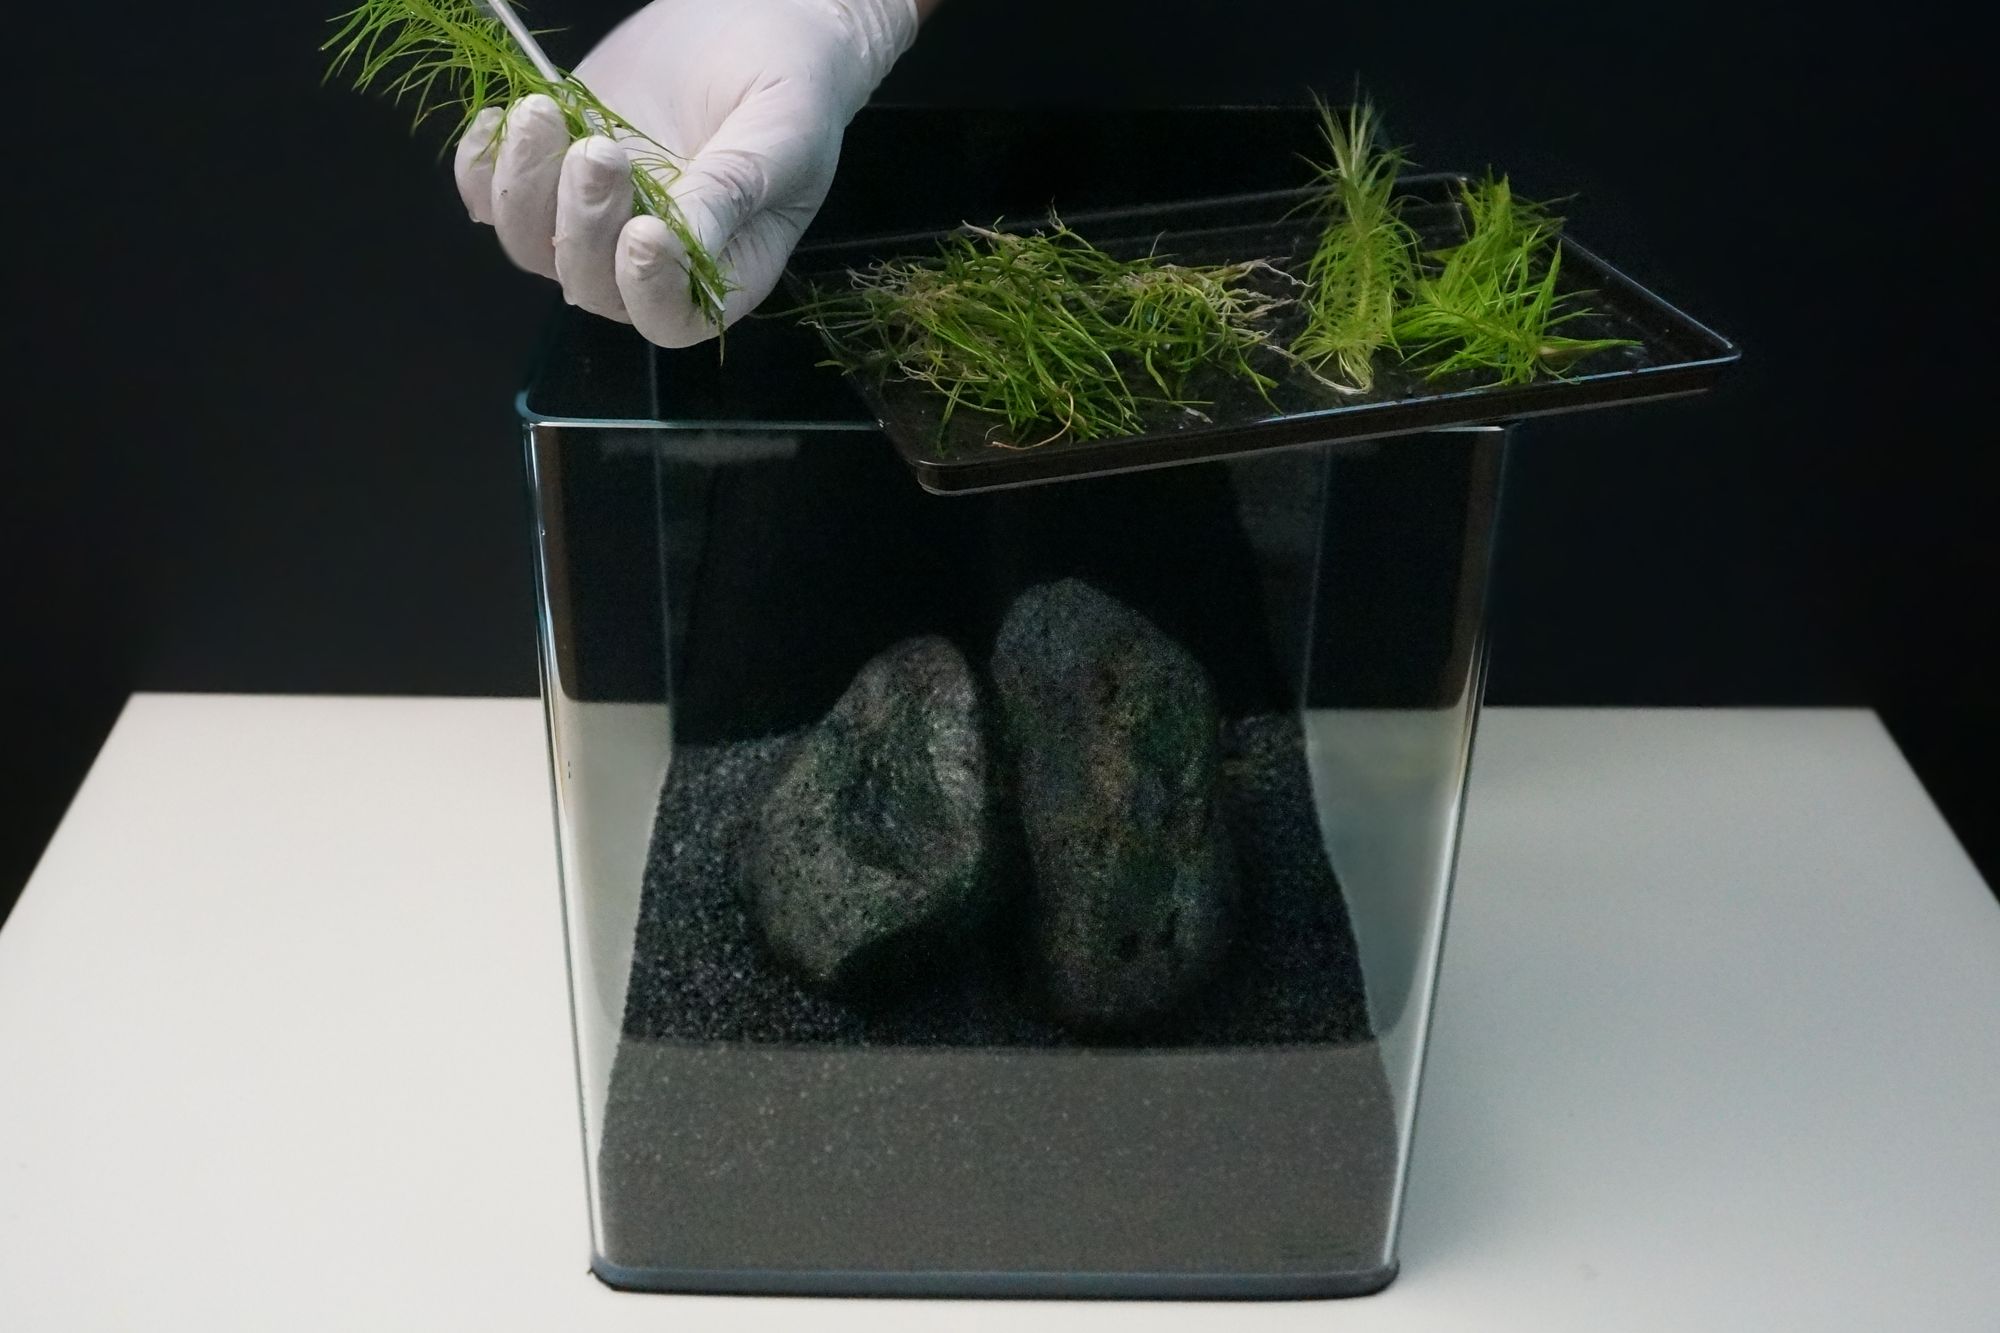
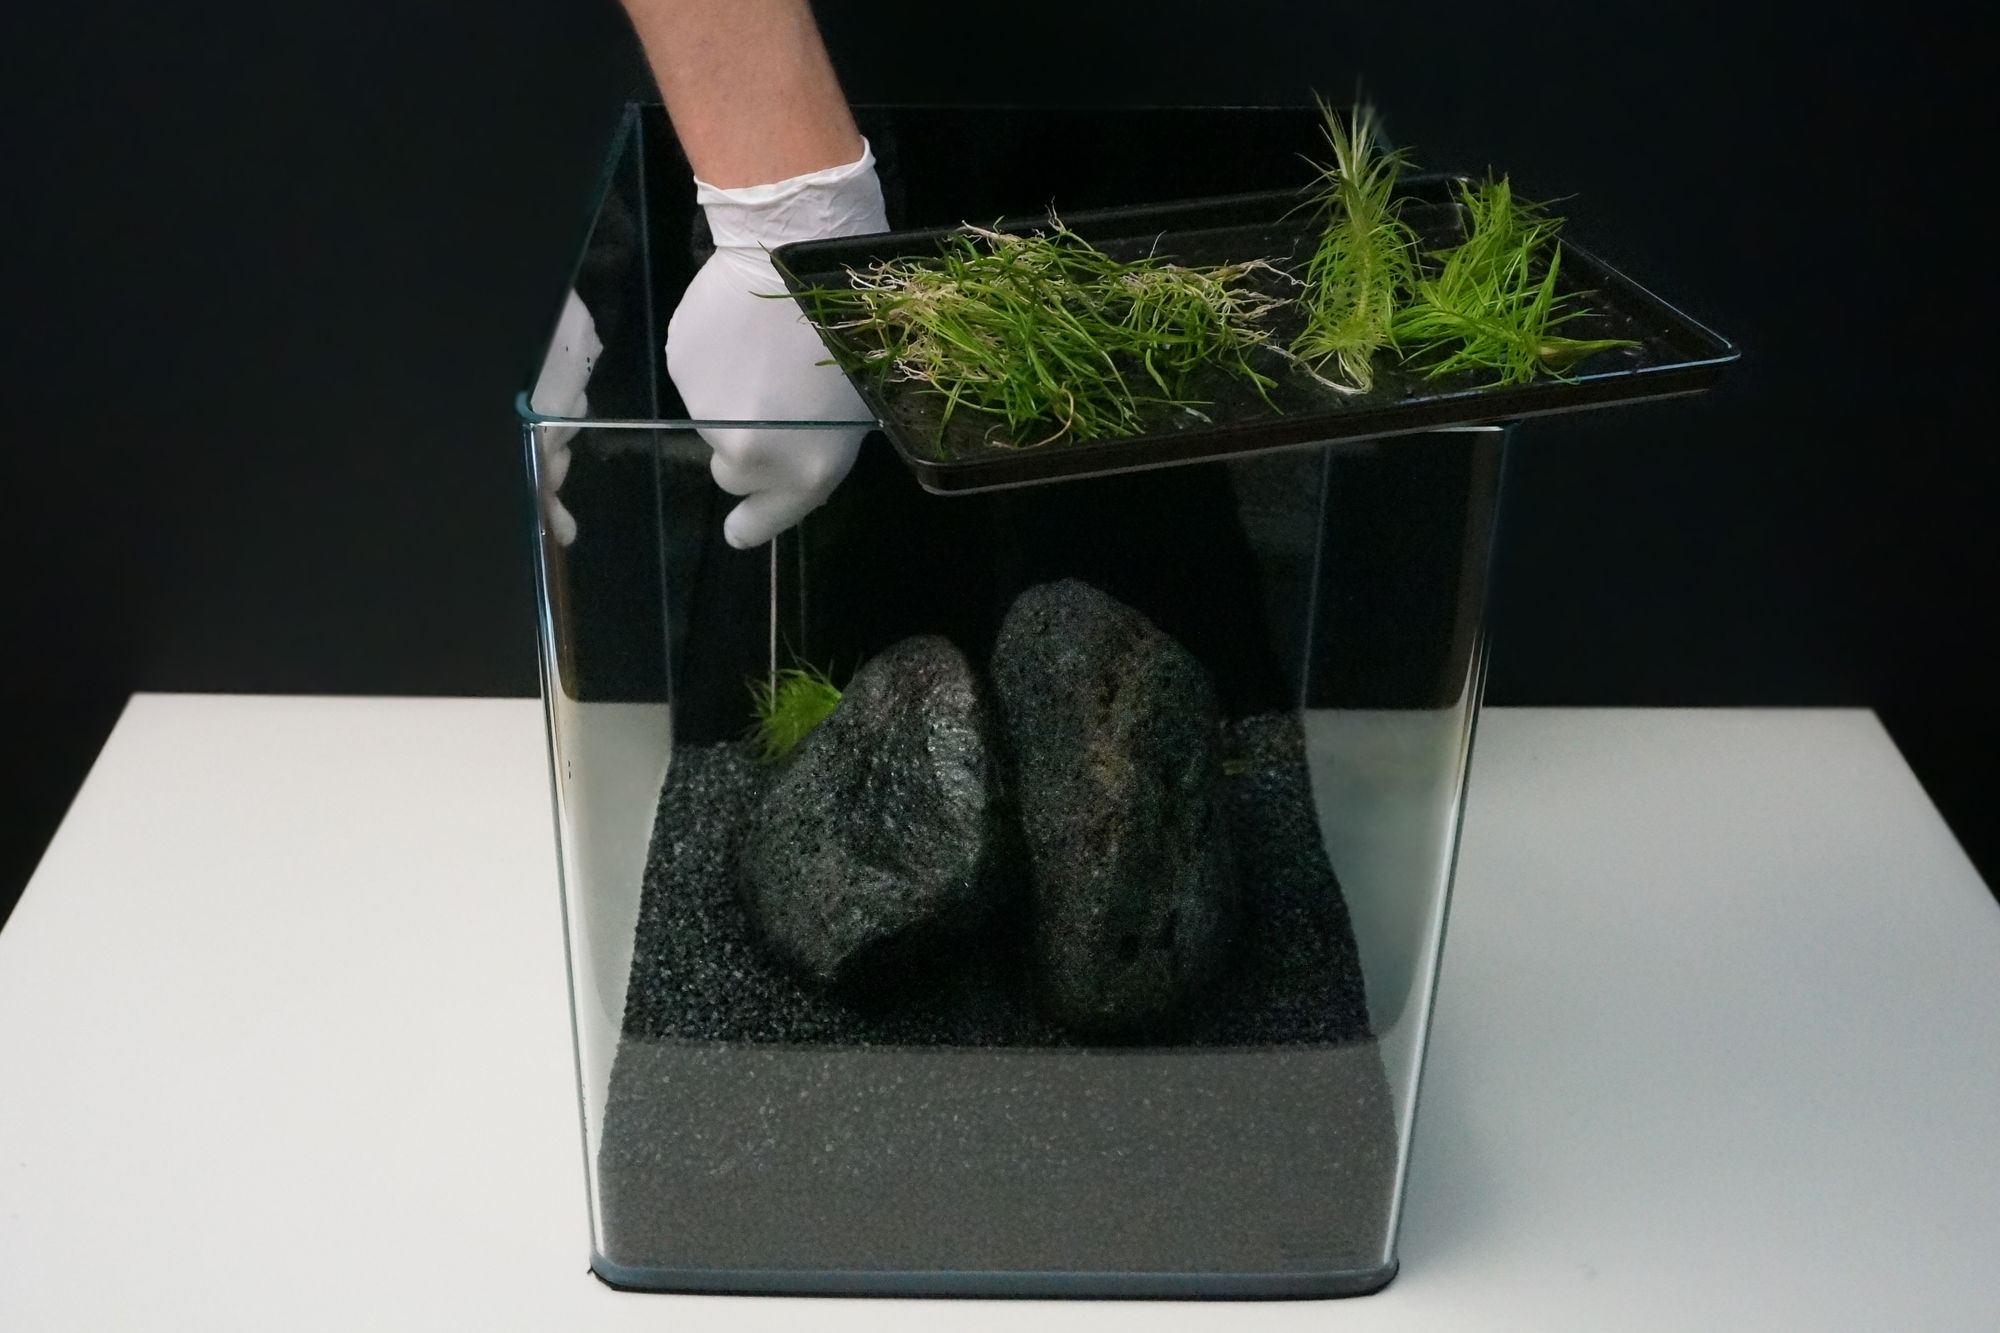
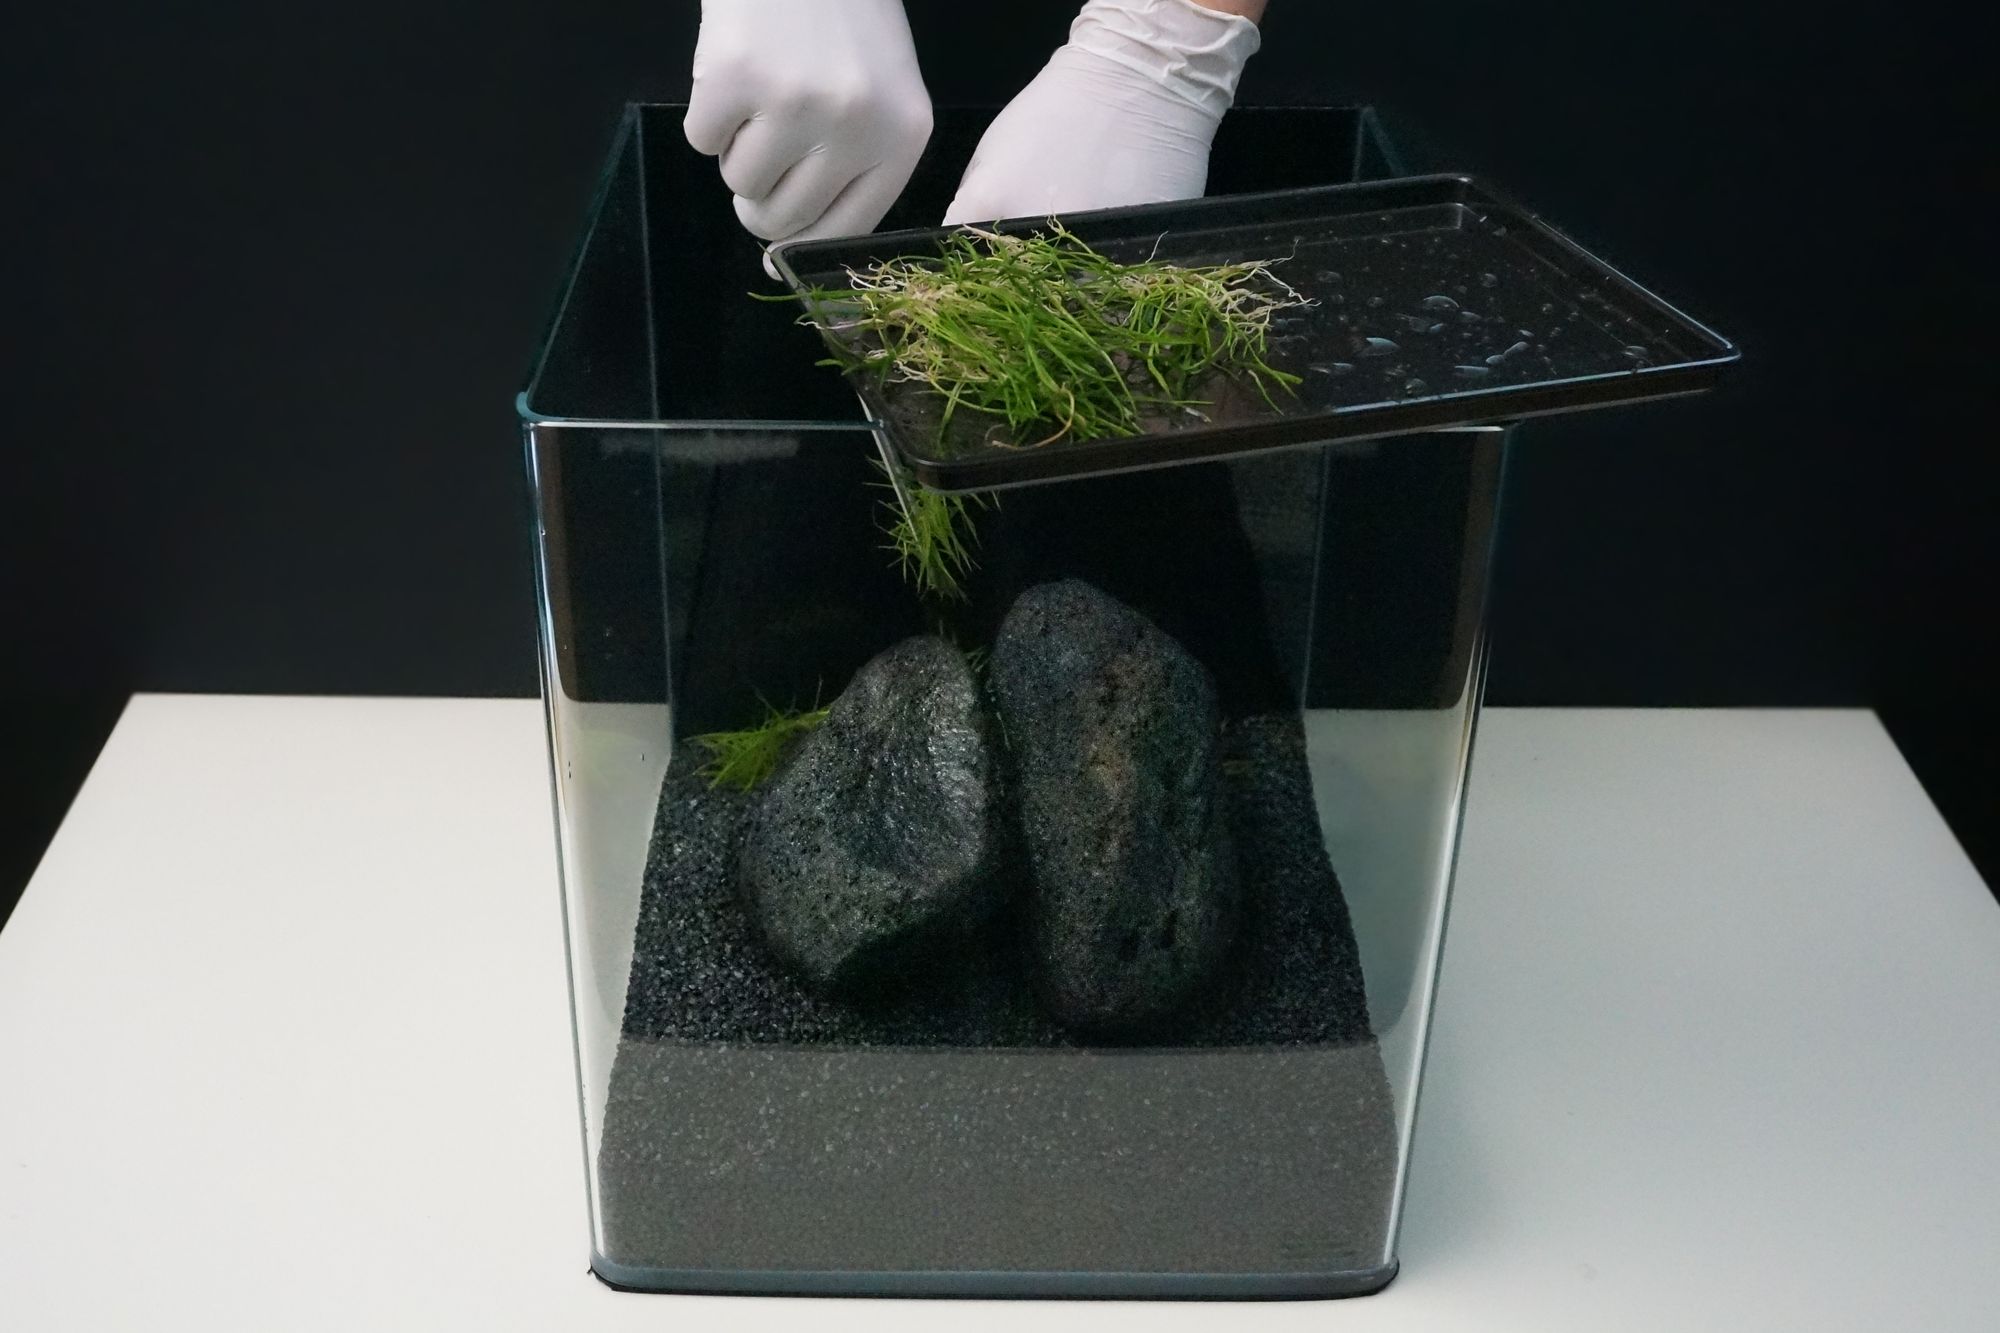
First, we broke down the plants into smaller batches in order to be able to cover more surface with a single plant. We started with one pot or in-vitro container of Lilaeopsis brasiliensis and Pogostemon Stellatus Octopus, you can also use Pogostemon helferi.
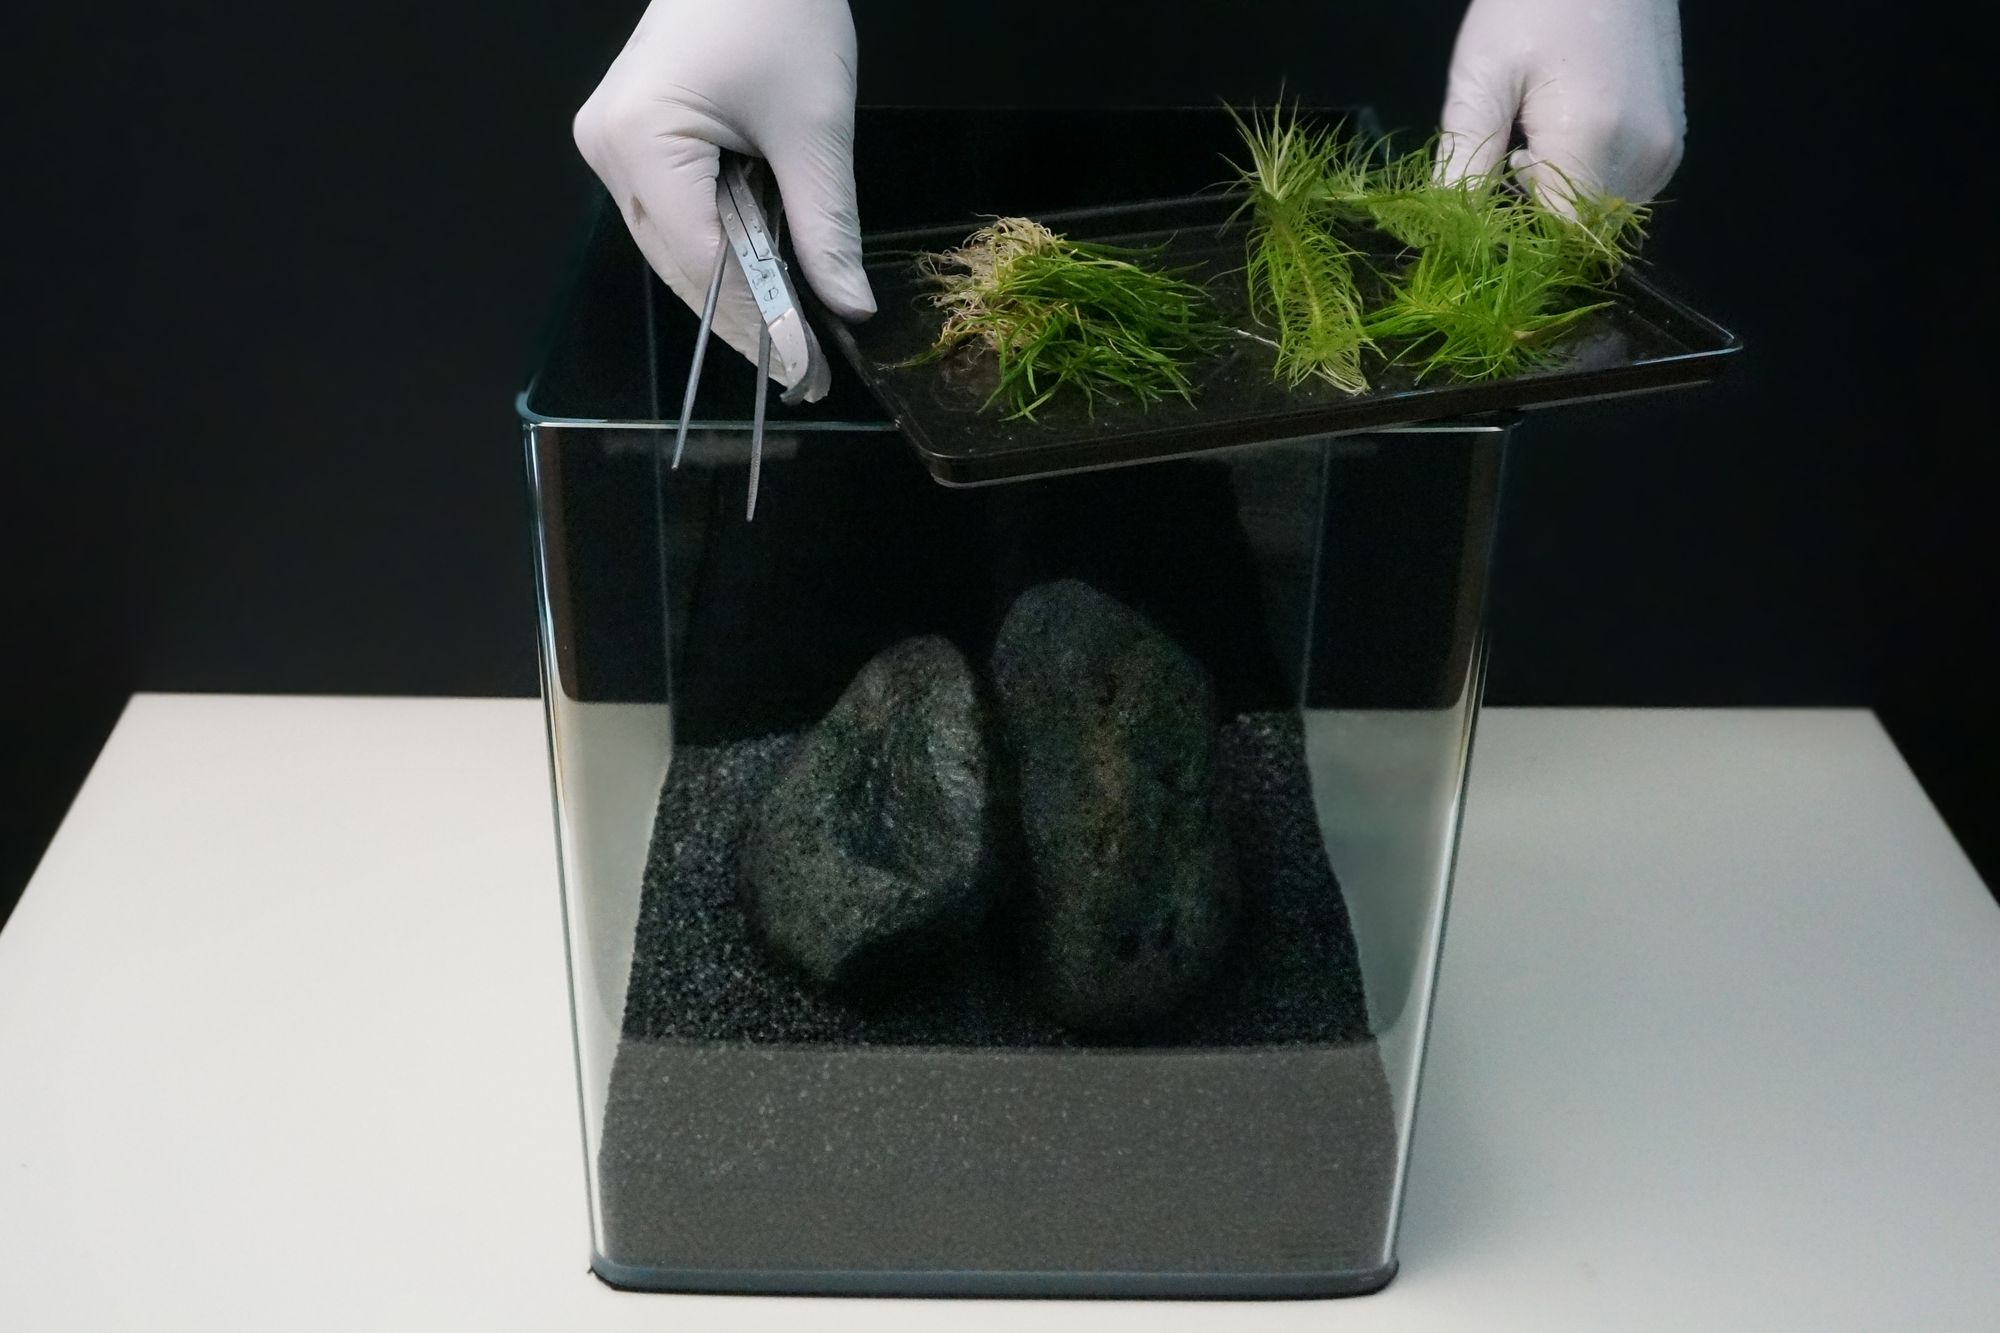 Lilaeopsis brasiliensis and pogostemon ready to be planted.
The pogostemon will be planted in the back and this is where we are going to begin:
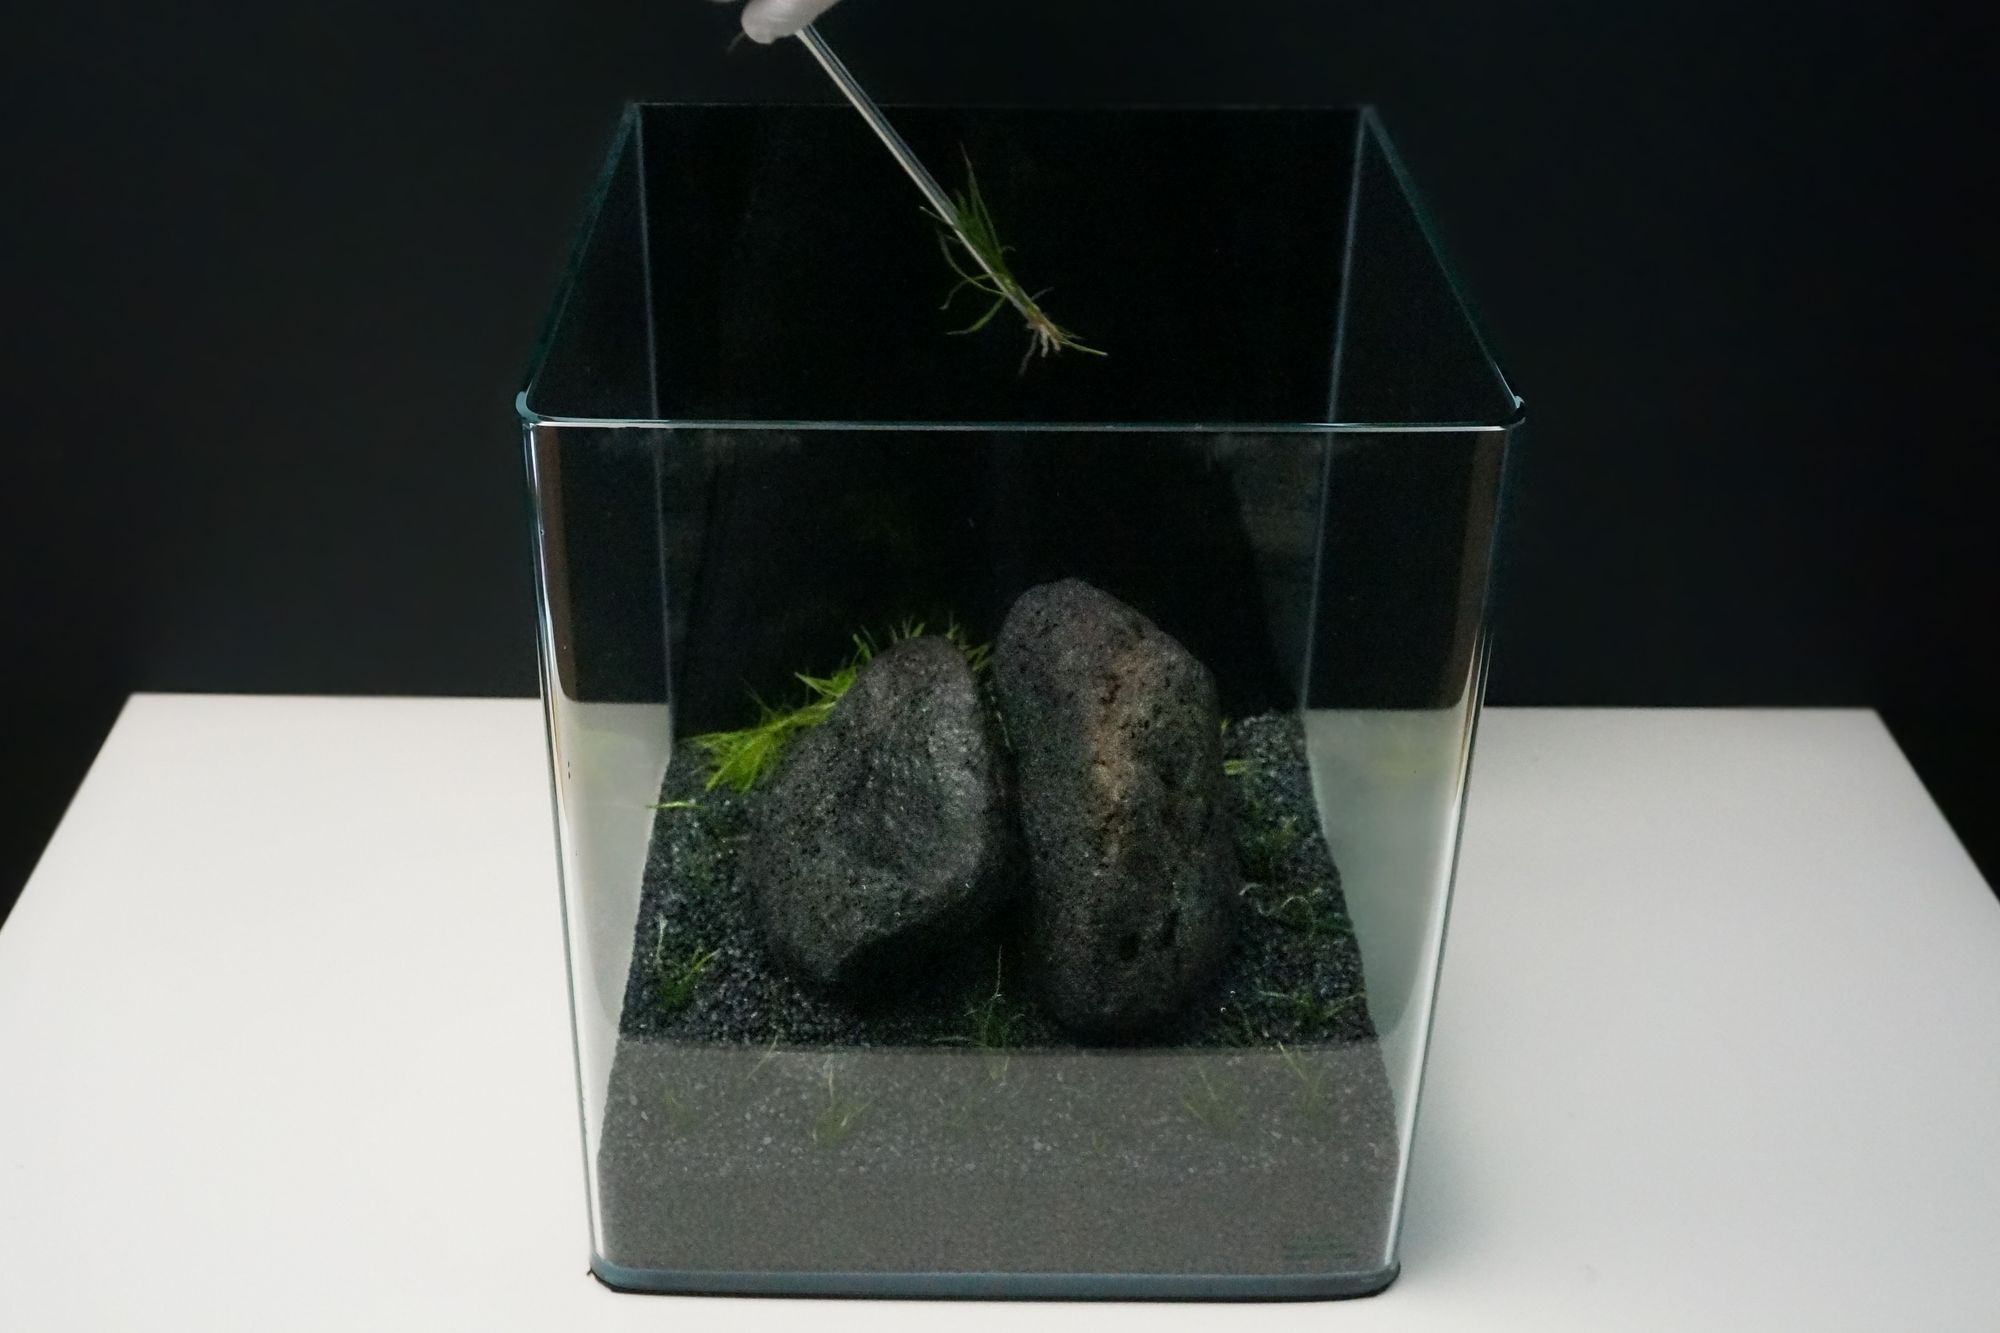
- Use your tweezers from the aquarium tools, pick up a stem of pogostemon, place it between the tweezer and carefully, but firmly squeeze the tweezer together.
- Now push the tweezer with the stem into the substrate until you feel resistance. Open your tweezer, start to carefully and slowly move the tweezer in circles while pulling it out of the substrate. In case you have pulled out the plant as well, just be patient and give it another try.
This process needs to be repeated until no Pogostemon is left.
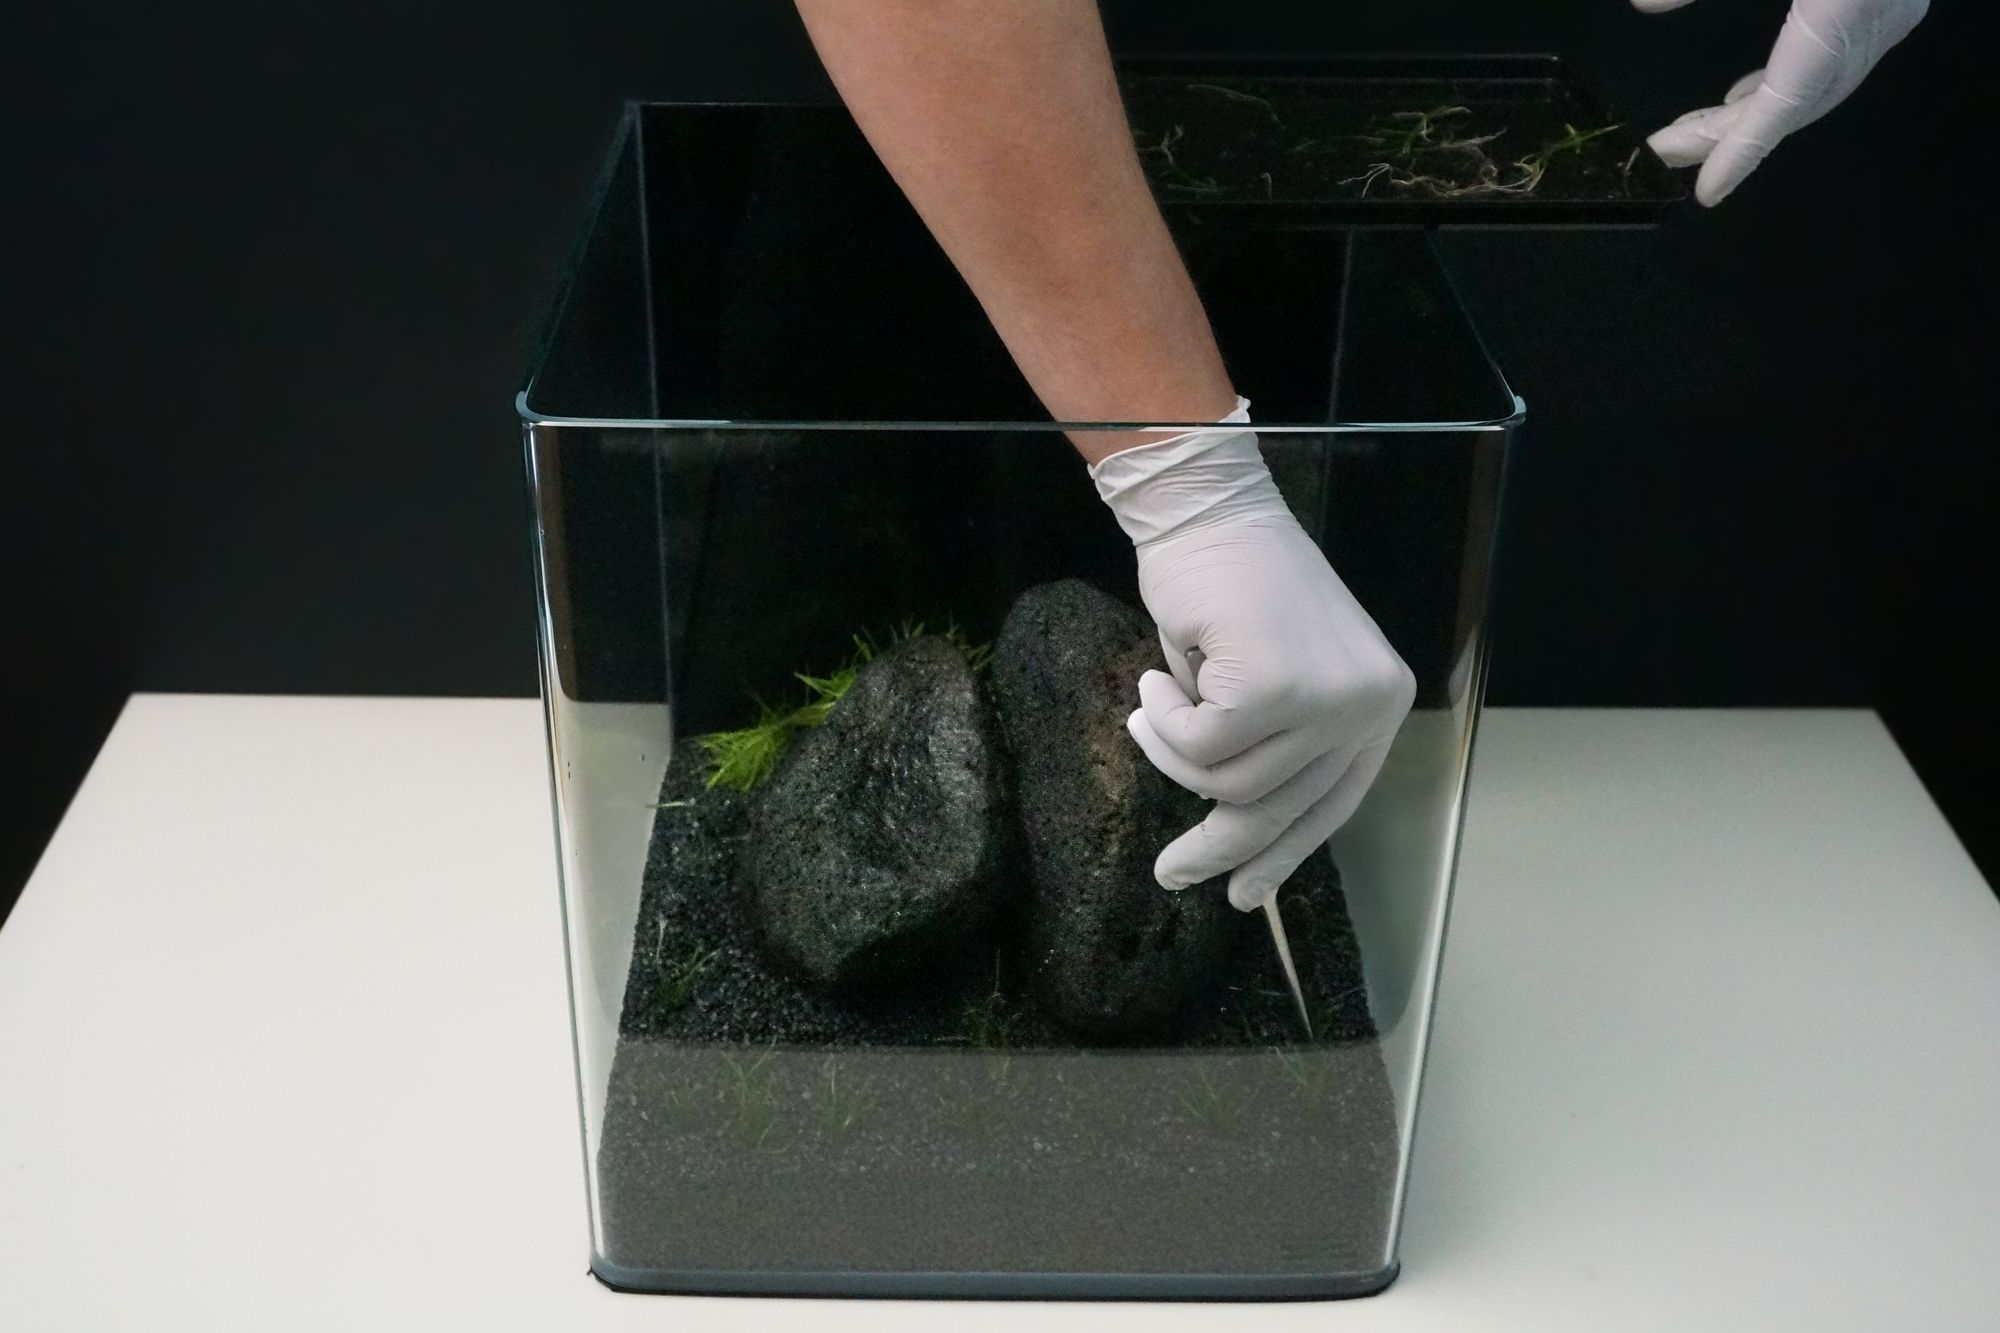
The lilaeopsis brasiliensis aka micro sword will be planted in the front and the middle.
Before picking up your tweezer, we recommend to break up the lilaeopsis brasiliensis in to as many small portions as possible. While you are doing this, it is best to place the roots between the thumb and index finger and roll the roots carefully back and forth until the Lilaeopsis brasiliensis looks like a cigar.
- Now it is time to use your tweezers from the aquarium tools, to pick up a rolled portion of Lilaeopsis brasiliensis, place it between the tweezer and carefully, but firmly squeeze the tweezer together. Now push the tweezer with the rolled portion into the substrate until you feel resistance.
- Open your tweezer, start to carefully and slowly move the tweezer in circles while pulling it out of the substrate. In case you have pulled out the plant as well, just give it another try. If this doesn't help and your tweezer get stuck in the mesh bag, think about adding a bit more substrate. If you are adding substrate we recommend to leave the hardscape in and just pour the gravel in around the rock.
Fill with Water
Depending on the country you live in, your tap water might be chlorinated. When using chlorinated water, it is important to first dichlorinate it in a separate container using a dichlorination agent.
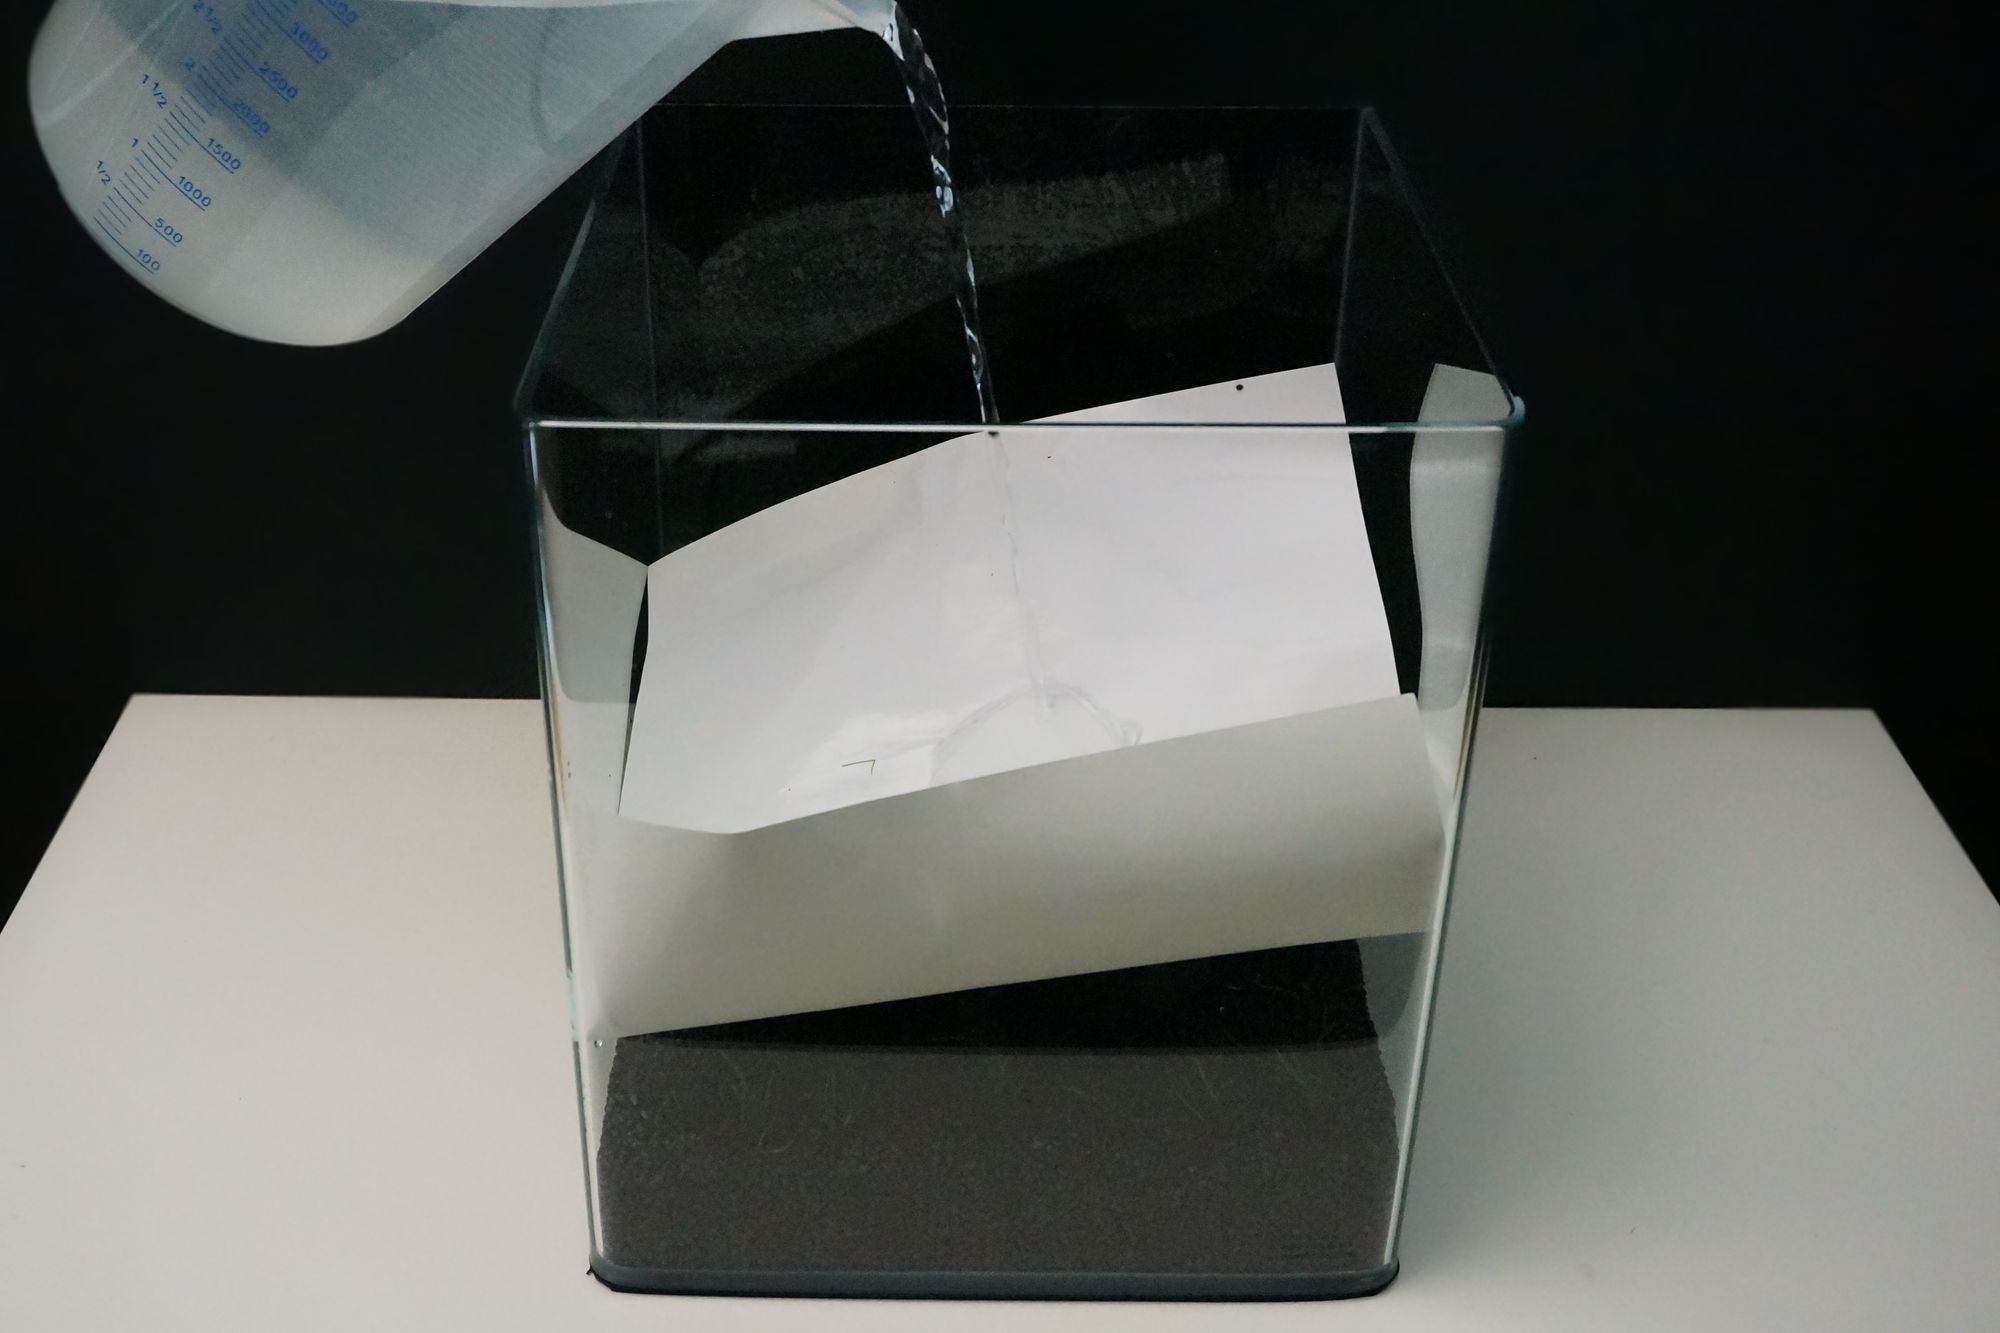
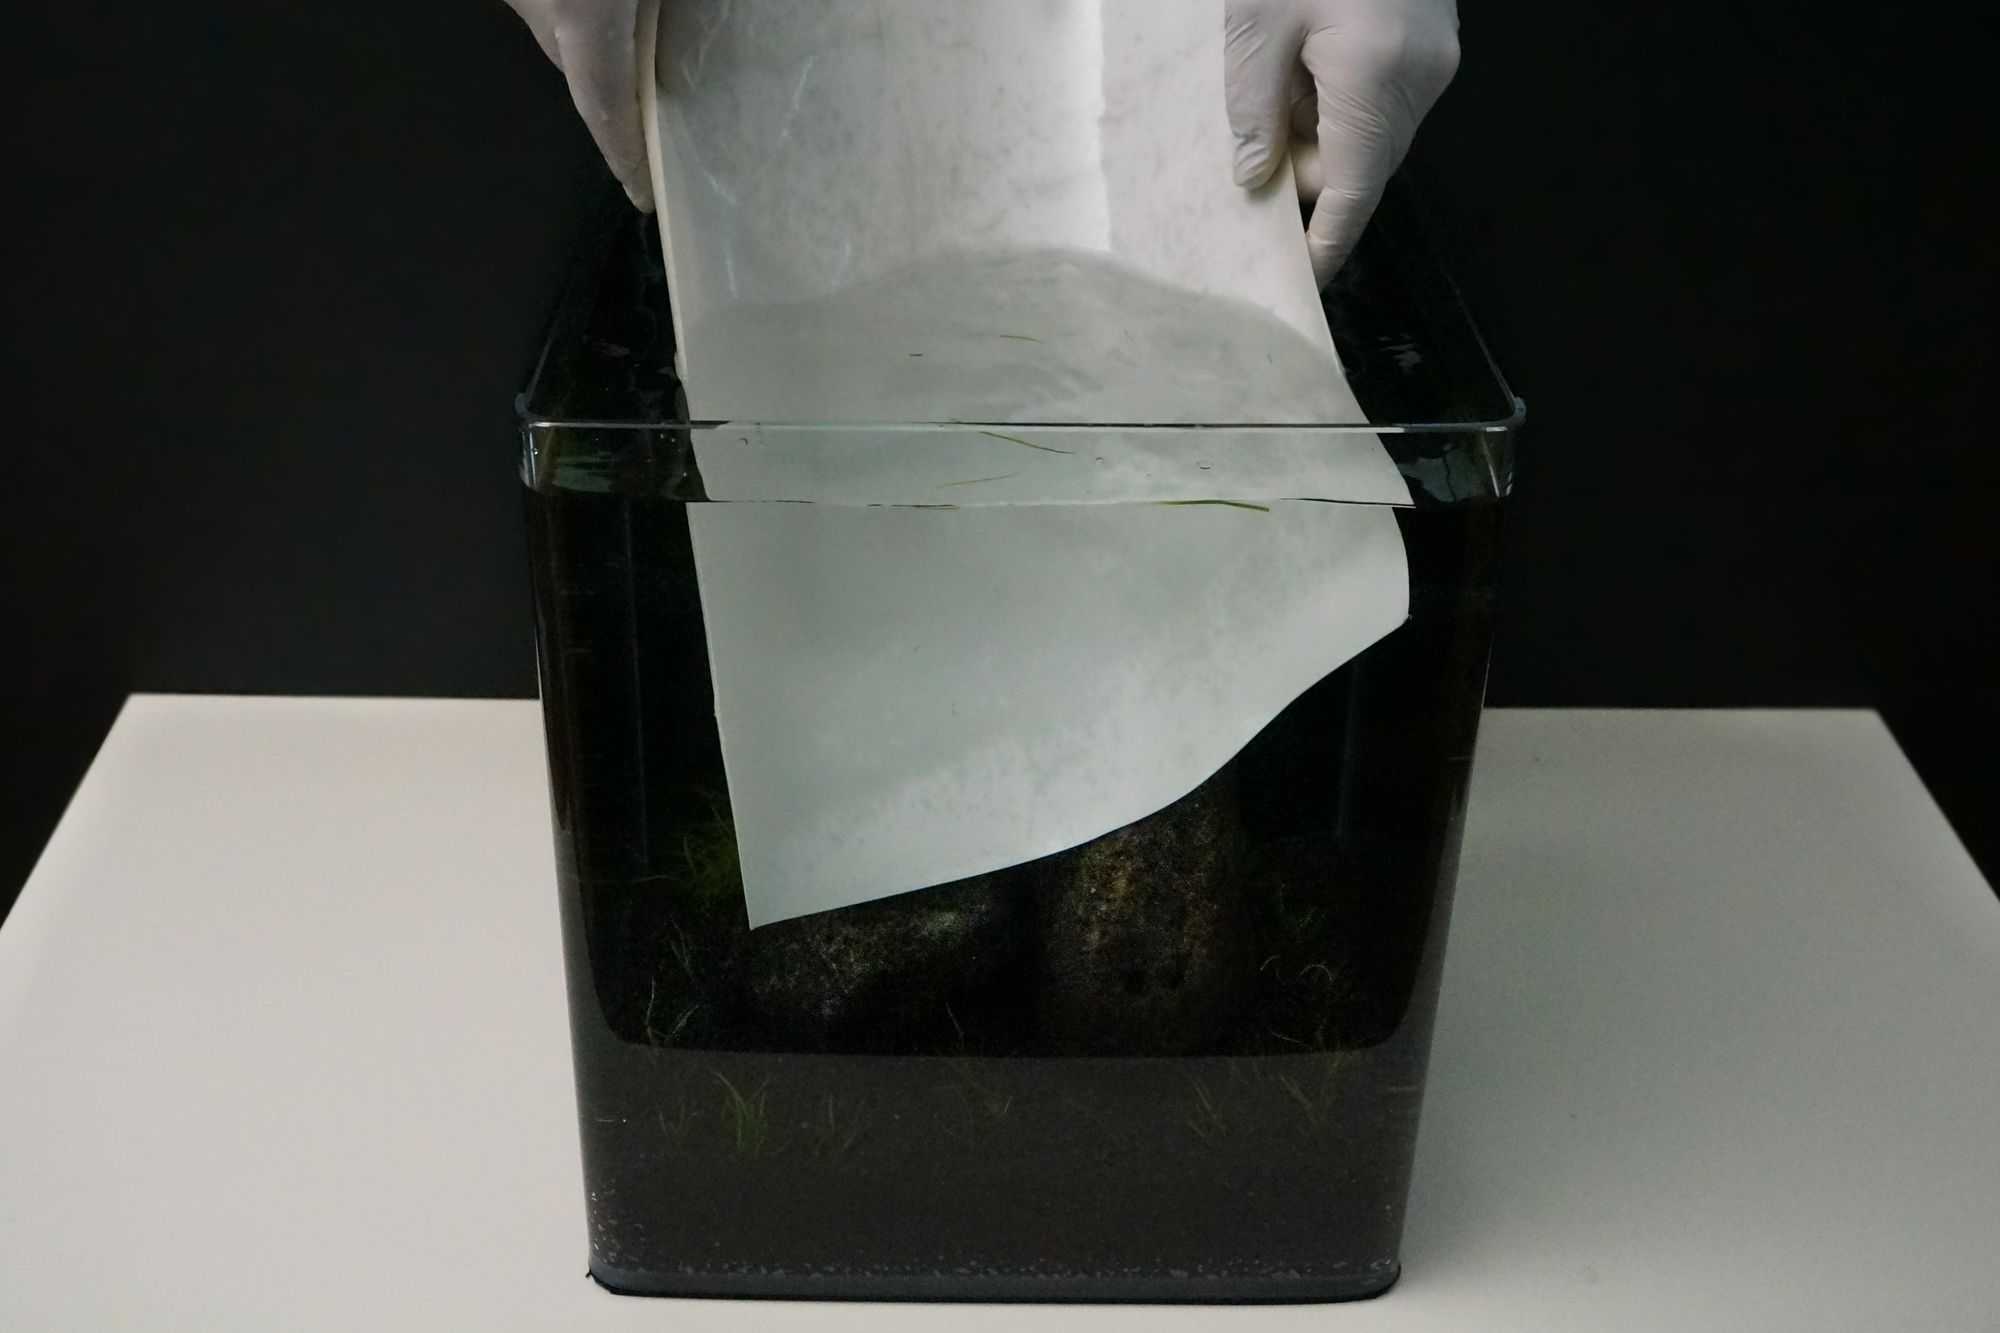
Afterwards you can use the dichlorinated water to fill up your tank. This step requires some patience and care as filling up the tank too quickly might lead to the plants being uprooted and the substrate layer getting messed up. You can either use
- a bucket
- or watering can with shower nozzle.
During this build we used a bucket in combination with some thin coated cardboard from the aquarium packaging. We carefully and slowly poured the water on top of the packaging. By doing so, neither the sand layer nor plants were messed up.

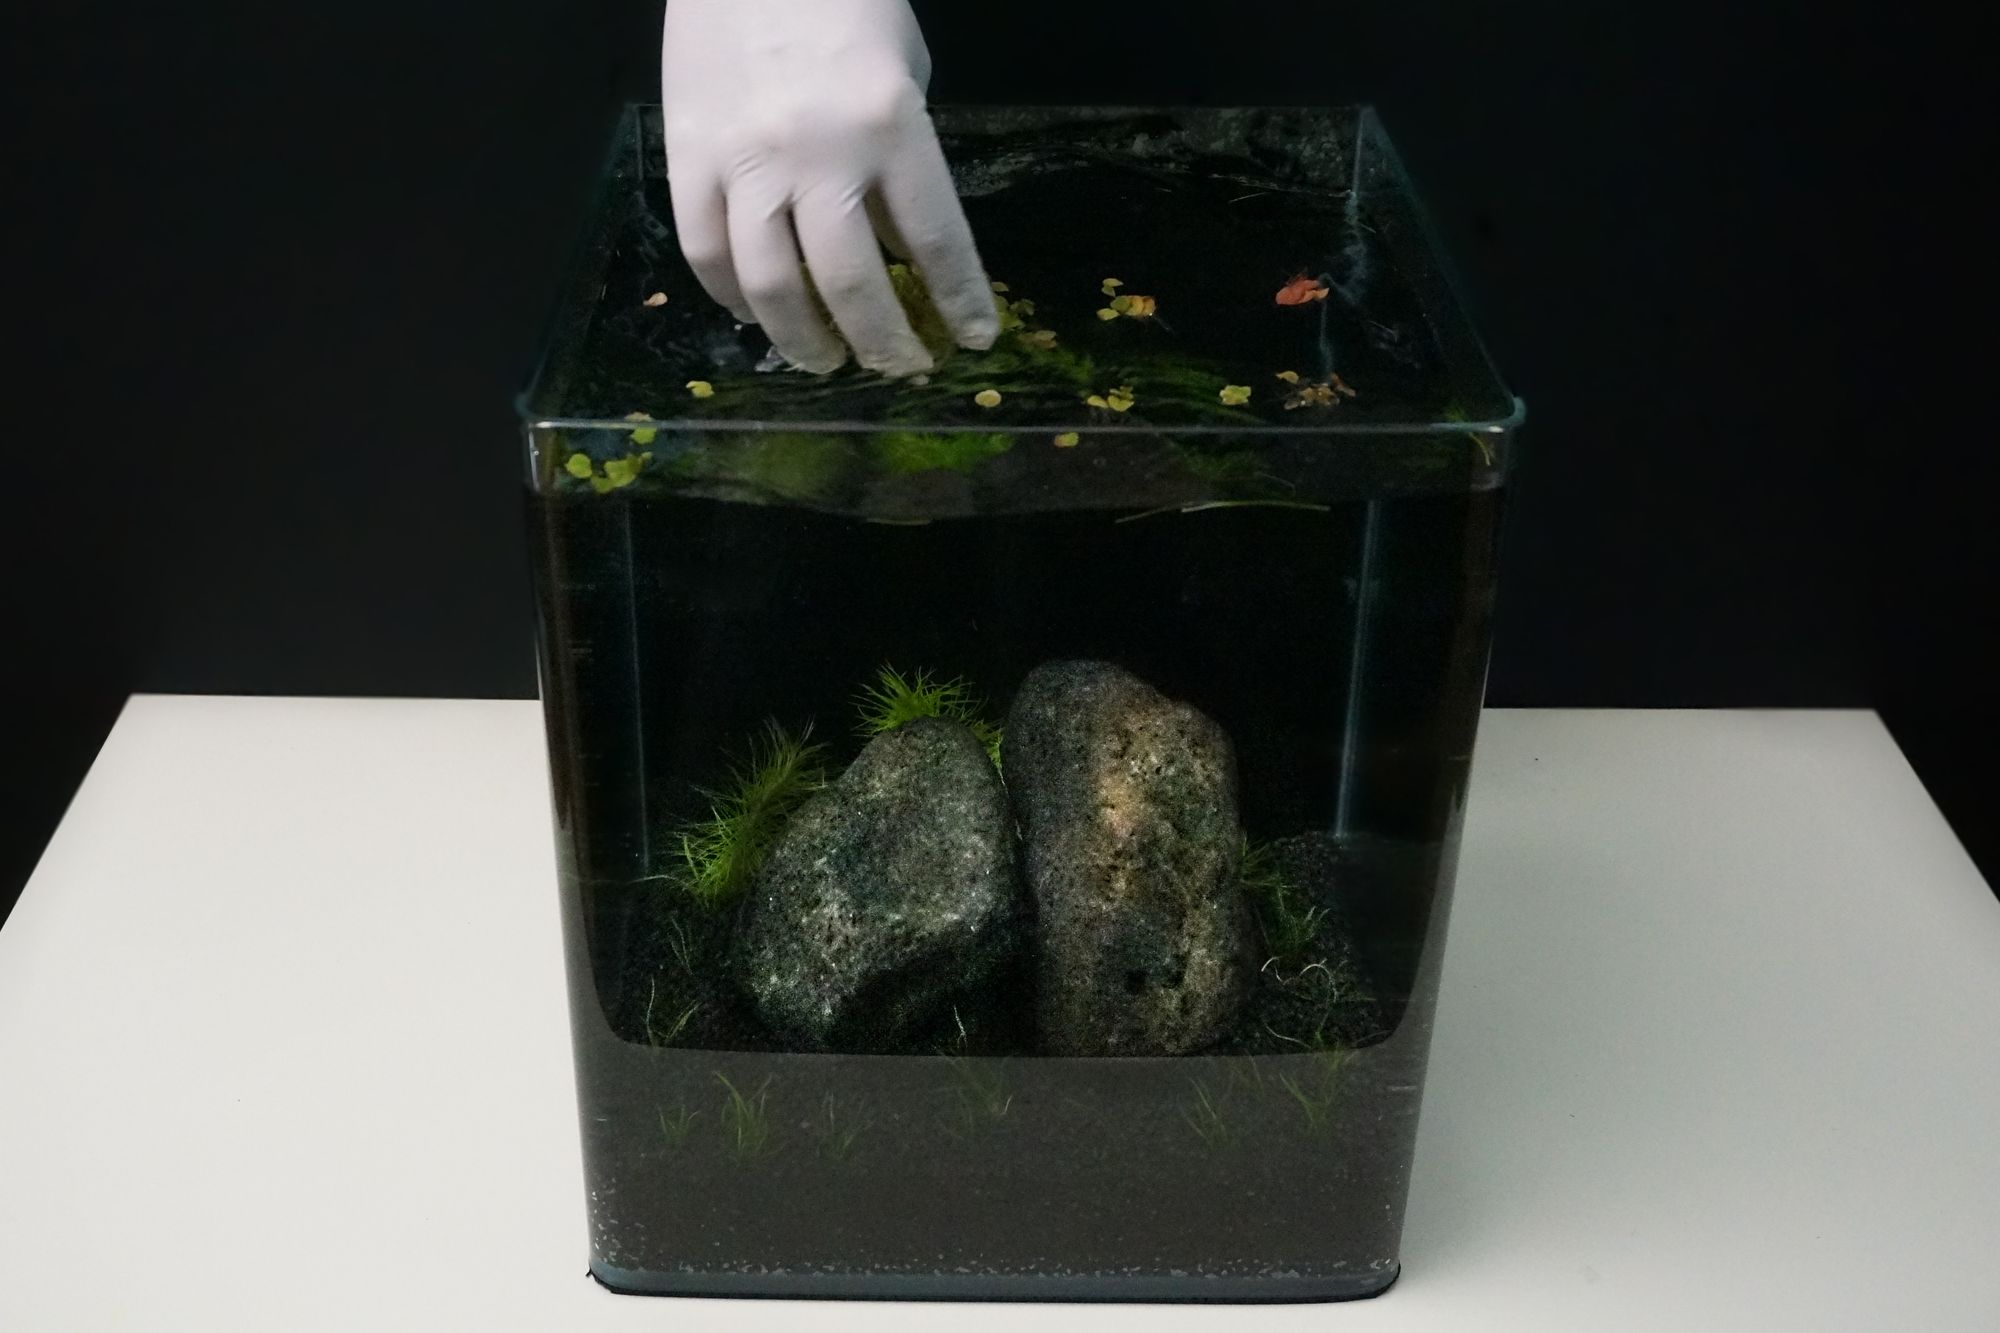
After filling the tank, make sure that no plants were uprooted and re-plant those which did uproot. Remove plant residuals (e.g., with a fishnet) from the water surface to achieve a clean look.
Now it is time to add Phyllanthus Fluitans as a surface plant. Surface plants are very important in this aquarium build as they use up a lot of the excess nutrients as well.
Livestock
In the very beginning you can safely add 10-20 shrimp to the nano tank. When adding livestock, it is important to distinguish between bought at the local store or online. Both options are fine, they just require two different methods of introducing the aquatic animal to your aquarium.
Adding aquatic animal bought online:
Aquatic animal, bought online should be delivered to your address within 1-2 days. Anything above that may result in an unpleasant surprise. Make sure you are able to receive the package yourself and open it right away to check the well-being of the livestock. In case of an unpleasant surprise most retailers demand a video within the first 2 hours of receipt.
If the delivery contains several packages of the same species, you can pour all of them into one big bucket. Make sure not to mix the species and in order to keep the stress level at a minimum, be relaxed and cautious.
For aquatic animal not purchased in you surrounding area, they definitely will have lived in different water parameters than you are going to provide. So, in order to help them adapt to your parameters, you can either use the dripping- or pouring method. Both methods slowly adapt the new fish to their future water parameters, the slower the better!
You can check out our dedicated guides for the dripping and pouring method for detailed instructions with photos.
Adding aquatic animals from the local fish store:
When buying aquatic animals from the local fish store it is always important to ask what kind of water they are using. Most fish stores either use tap water or reversed Osmosis (RO) water. In case the store uses RO water, use either the dripping or pouring method mentioned above. If the store uses tap water, you can use the following steps:
- Place the bags with aquatic animal in your aquarium (so that the temperate can equalize).
- After 30 minutes or more pour the bags with aquatic animal into a bucket.
- Turn off the aquarium lights for a couple of hours (less stress for the fish and they might not hide).
- Get a fishnet to carefully scoop out the aquatic animal (best one by one), make sure not to stress the aquatic animal and put them into their new home. This can take some time and you definitely need to be patient.
Pro-Tip: Do not pour any water from other external (not in your household) aquarium into your actual aquarium. You don't know the water history and issues. There could be bacteria, medication or who knows what in the water.
If you decide to add livestock from the very start of a new aquarium setup you should test the water parameters in your tank daily. When you notice ammonia or nitrite spiking, it is absolutely mandatory to perform a 50% or more water change in order not to endanger the life and safety of your animals. This also applies when using the Walstad Method or a low-tech aquarium in general, like in this case.
Maintenance
After initial setup you need to do daily water tests where you check for harmful spikes in ammonia or nitrite. If you encounter one such spike, you need to perform an immediate 50% water change to prevent your shrimp getting harmed. Apart from these water checks (and feedings) you can leave your tank alone for the coming weeks. Note that you will most likely encounter (dust) algae during this period. You don’t need to do anything to remove it, as the ecosystem will take care of them itself with time.